
Penultimate article in the series of posts dedicated to creating and promoting ecommerce products with AI.
This time, we are going to see how to create the images needed for a product, which will be of three types:
- Main product image: the only truly essential one.
- Product-in-use images: what we call “lifestyle”.
- A banner featuring the product: to advertise it on the homepage or in a listing.
When we finish this article, the only thing left will be to create the content to promote it on social media.
With that we will close the complete process, which I remind you includes:
- Turn the products in your supplier’s PDF catalogue into product pages in your ecommerce.
- Create the necessary content (descriptions, meta tags…) for the previous product pages in batches, not one by one.
- Improve one specific product page from the whole batch, which is what we are going to do today.
- How to create a product sales email.
Let’s get to it. We start with the product images.
#1. Main product image
We are not actually going to create this image, because it has to be a real image.
What we are going to do is optimize it to standardize the design of all product images in the ecommerce.
We are going to do it in two ways:
- Image background color.
- Image size.
I am going to start from the product image we have been using throughout the whole series of articles:
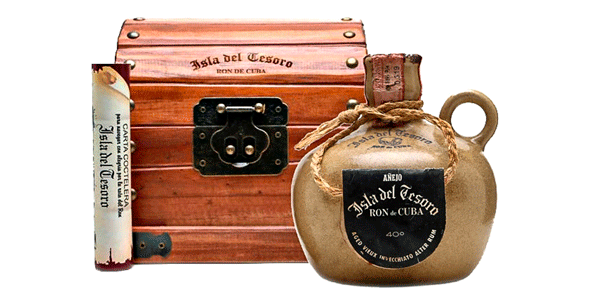
Image background color
I do not know if you have noticed, but in all ecommerce sites of a certain relevance, product images always have a consistent background color.
It can be white—the most common—or light gray.
The point is that, when uploading a new product, the supplier may provide you with the product images you need, with the standard background color used on your website’s product images, in the quality and format you need.
Or they may not.
So let’s talk about the cases where they send us an image with a background color that does not match what you want.
Here you need two things:
- Remove the image background.
- Give it the background color you want.
How to remove an image background with AI
You have several tools, both paid and free.
Free tools
I am bringing you the two best ones I have tried.
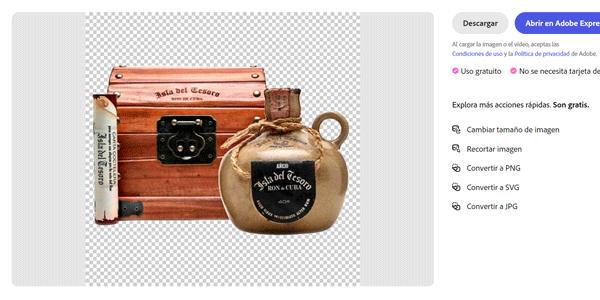
Adobe Express.
For me, the best. Because of everything it lets you do for free.
Using it, like almost all these tools, is extremely simple:
- Upload the image.
- Click the download button.
That’s it.
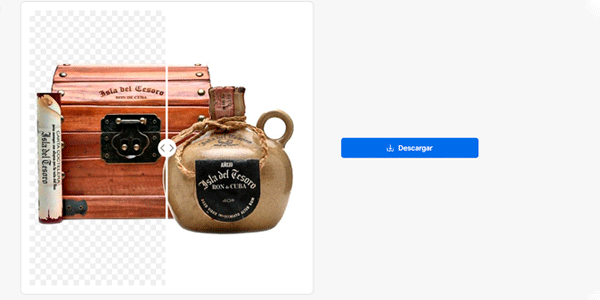
Freepik
The Malaga-based company has an AI-powered background removal using AI.
Although the tool is not free but freemium, the free plan is generous and sufficient in many cases.
Paid tools
I will give you three, although there are quite a few more:
- Canva: although it is free for many uses, the background removal feature is paid.
- Offeo: a tool for making AI videos with templates. It is paid and includes a background removal tool.
- Photoshop: of course, you can also use Photoshop, which is what I usually do, but you already need some minimal knowledge of design or of how to use the tool, which means it is not advisable in every case, unlike the previous tools.
Free and paid: Slazzer
Although in principle it is paid, I do not include it above for a reason I will explain now.
The results are actually quite good. The downside is that they only give you two free credits.
But if you only need 500x500px images you can use the trick of inspecting the element in Chrome and opening the generated image instead of paying for it:
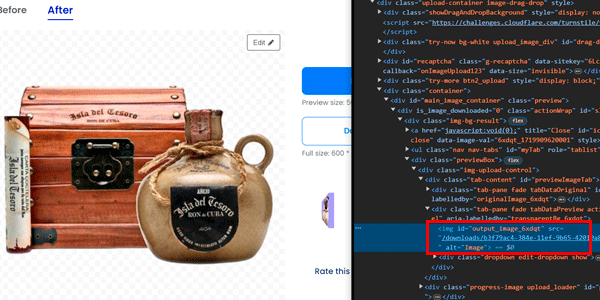
I explain how to perform the trick in detail in this other article about Adobe Firefly.
Just so you know, doing it this way lets you create as many background-free images as you need.
Extra: CapCut
TikTok’s editing tool can also be used to remove the background. And not only from images, but from videos too. As well as letting you add whatever background color you want.
I will not explain how to do it because you have a complete tutorial here.
And speaking of adding the background color, I will explain how to do it.
How to add the right background color to your website’s product images
Once the background has been removed, we have several scenarios:
- If your product images have a white background, you only have to convert the PNG you obtained to JPG so the background color becomes white. You can do this with Photoshop or similar tools. It may not even be necessary if your CMS optimizes the image directly to JPG, WebP or the most appropriate format in each case.
- If your product images have a very light gray background (or any other color): keep reading.
We do not need AI for this, although you could ask Dall-E and it would add the background without a problem.
Once we have the image without a background, you can open any program and do it, since it is a basic task.
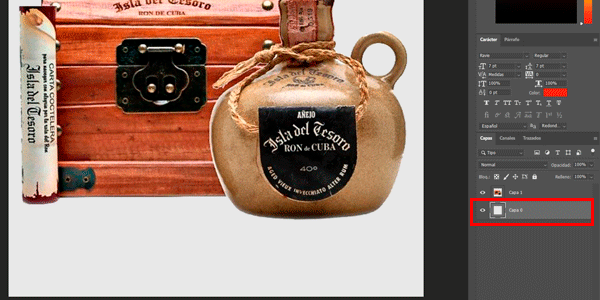
With Photoshop
- We open the downloaded image.
- We add a layer underneath.
- We fill the layer with our gray color.
With Canva
Pretty much the same thing:
- You upload the image without a background.
- You create a new design.
- You add a square shape with the standard background color of your product images.
- You send the square to the back (behind it)
- You export.

Now you know how to give all your product images the same background color. But we still have to solve the other common problem with this type of image: not having them at the right size.
How to enlarge an image without losing quality with AI
It is very common for the supplier to send us a small image taken from a PDF, or worse, from an Excel catalogue.
Then we will need to enlarge it.
And although you can do it with tools such as Photoshop, the truth is that the results are usually not ideal.
So we are going to use AI to improve them.
Again, I will show you a couple of free tools, although there are several more.
Free tool: Waifu
The classic one. The first free tool I used that noticeably improved Photoshop scaling.
https://www.waifu2x.net/index.es.html
I have been using it for quite a few years—when I started using it, Nvidia sold new graphics cards for less than €100, to give you an idea of the date.
Since then, the interface has not changed, as you can see:
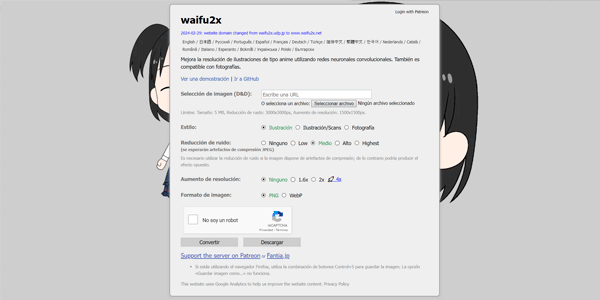
It is also easy to use:
- You upload the image you want to enlarge.
- You choose the style, which for a product will be “photography”.
- Noise reduction: I leave it in the middle.
- Resolution increase: 2x will almost always be enough. If it is not, try 4x.
- The output format will depend on your store’s CMS, but in my case I choose PNG and convert it to JPG in Photoshop or a similar tool.
- You download the image.
Paid tool: Magnific.ai
For now, this is the domain:
I say for now because Freepik bought it and I would not be surprised if it integrated it into its suite of tools under the parent domain sooner rather than later.
By the way, Adobe Express also enlarges it for you, but only in the Premium version of the tool.
Combine both processes
The cases we saw above—removing the background, adding another color or enlarging the image—are not mutually exclusive. In other words, you may need one, another or all of them.
So if you have an image that is too small with a background color that is not suitable, the order of the steps you should follow is this:
- Enlarge the image to the size you need.
- Change its background.
If you follow this process, the results you get will be better.
#2. Product-in-use image
These are the kinds of images that are added to a product description.
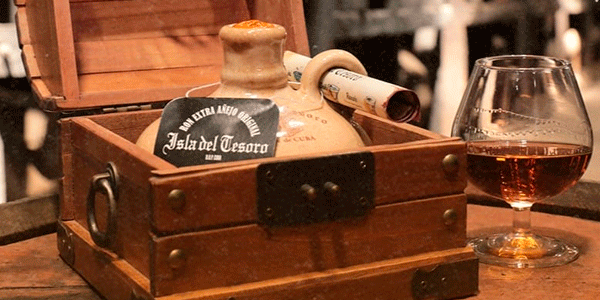
They show people using it, and I call them “lifestyle” because they should evoke the use of a product.
I mean an image like this:
And I would love to tell you how to create them with AI.
Explain the most suitable tools to you
And give you the prompts.
But it turns out that what I have achieved so far is stuff like this.
Dall-E
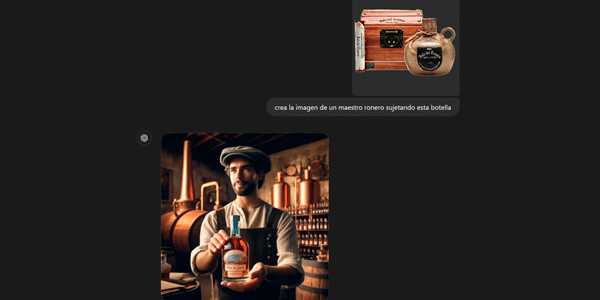
Can you see the bottle I gave it anywhere?
Neither can I. Dall-E reinvents it, so it is useless for this.
Vidnoz
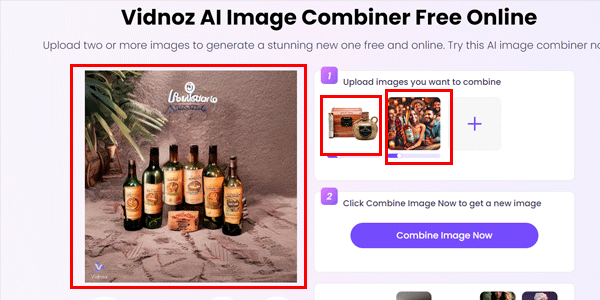
Here you can already see the result of the ¿fusion?
Firefly
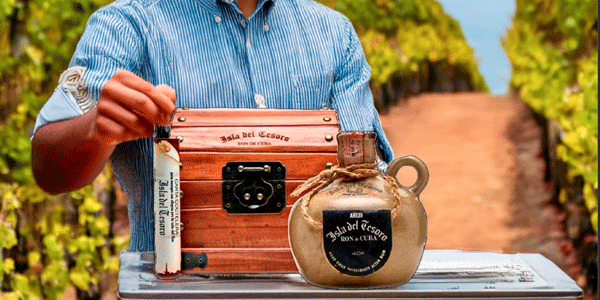
Nothing remotely decent.
I am sure it is my fault and that more testing is needed.
But I have really put hours into it and there is no way.
Or maybe the technology is not there yet.
In any case, I will keep testing and update this article when I find something better.
Fortunately, I think what comes next will appeal to you.
We have two options, with AI or without AI.
And the second will not always be better.
When you have no design training and need to create a banner, one thing that works is copying the composition of other banners you like.
For this, you can go to the Facebook Ad Library, select one and replicate it in Canva, for example.
You can also use some of the templates that Canva or Piktochart’s AI banner maker offer for free and fill them with your images, copy and fonts.
Or you can use this other process, which, depending on the situation, I like more. Because it gives you different things.
We are going to use AI to create a slightly different banner format that will always work.
The steps are these:
- We ask ChatGPT for a prompt for Ideogram.
- We generate the banner in Ideogram.
- We expand it with Freepik.
- Optionally, we remove anything we do not want with Firefly
- We add the product image.
- Optionally, we can add some elements.
#1. We ask ChatGPT for a prompt for Ideogram
Why do it this way instead of directly in Ideogram?
Because unless you are a great Ideogram expert—and I am far from earning that label—I am pretty convinced that ChatGPT will improve the prompt you could write yourself, adapting it to what Ideogram expects.
In any case, you have the resulting prompts for Ideogram below so you can judge for yourself.
So I am going to give you two prompts.
With variables
The first is this:
Make an AI powered prompt to generate an image in Ideogram. The picture is a banner for a product. The headline should be [title] and should be on the left. The background should be [background]. The image style should be [style].
[title] = “Cuba's greatest treasure”

[background] = a pirate boat in the sea on sunset

[style] = realistic photo, movie style
Whose result is this:
AI-Powered Prompt for Banner Design:
Product: Isla del Tesoro Ron de Cuba
Headline: "Cuba's greatest treasure" (positioned on the left)
Background: A pirate boat in the sea at sunset
Style: Realistic photo, movie style
Detailed Description for the Image:
Create a realistic photo-style banner with a cinematic feel for the product "Isla del Tesoro Ron de Cuba". The banner should feature a pirate boat sailing on the sea at sunset as the background. The boat should be large with its sails fully unfurled and adorned with classic pirate elements, such as the Jolly Roger (pirate flag), cannons, and a wooden deck. The sea should have realistic waves, and the sky should be a vibrant mix of oranges, pinks, and purples typical of a stunning sunset. The lighting should have a dramatic, movie-like quality, with shadows and highlights enhancing the scene. The headline "Cuba's greatest treasure" should be prominently displayed on the left side of the banner. There should be no other text on the image besides the headline. This background will complement the product "Isla del Tesoro Ron de Cuba".
Direct prompt
The second prompt is this one:
Make an AI powered prompt to generate an image in Ideogram. The picture is the background of a banner with a pirate boat in the sea, the boat is in the middle, and on the left should be this title “Cuba's greatest treasure”.And its result is this:
Prompt:
"Create a background image for a banner featuring a pirate boat in the sea. The boat should be positioned in the middle of the image. On the left side, include the title 'Cuba's greatest treasure' in a prominent and elegant font."
#2. We generate the banner in Ideogram
You access it from here and register with your Google account.
The result I liked most with the variable prompt is this:
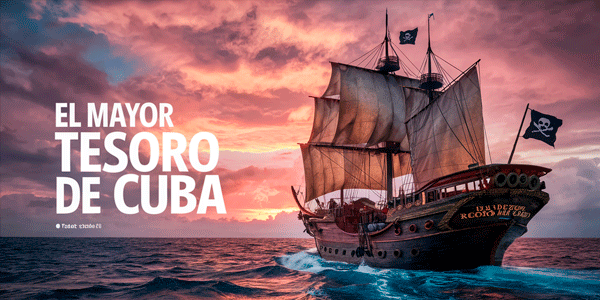
And I am showing you all four from the direct prompt because they are all quite good:
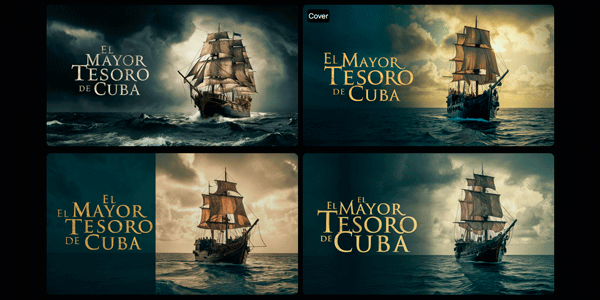
So is the second route better?
It depends on the banner you want and the product you are advertising.
In some cases I got better results one way and in others the other way, so try both.
#3. We remove what we do not like with Firefly
Although, as I told you before, I like the second route more, I want to explain this optional step, which you will encounter more often if you go with the first.
What I mean is that there may quite possibly be something in the image that does not fit: some text or some element you want to remove.
And for this, we can use Adobe Firefly.
I have a tutorial where I go into Firefly in depth and explain how to remove an element. You only have to follow it to remove things such as this extra text:
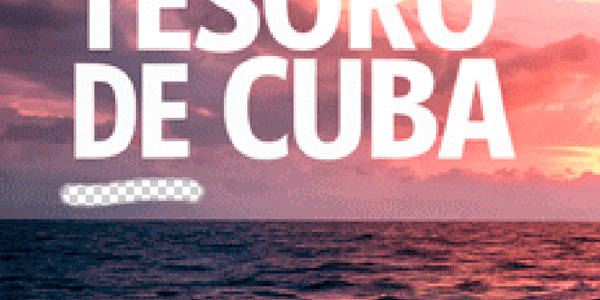
The result is this:
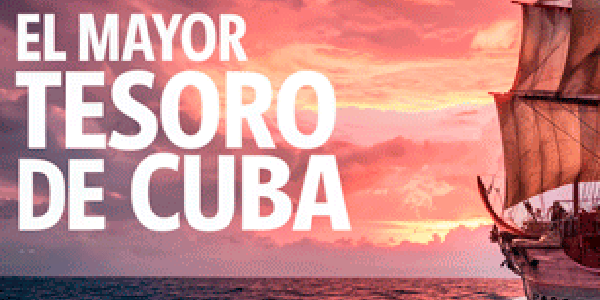
There, no more extra text.
#4. We expand with Freepik
It is very likely that the banner you need has a different format from the one Ideogram gives you, so we are going to expand it.
And for this we are going to use Freepik’s free tool, which is the one that has given me the best results so far.
- We go here:
https://www.freepik.com/pikaso/expand
- We upload the image.
- We click custom and enter the dimensions of our banner:

- We place the image like this, leaving room on the right for the product photo:
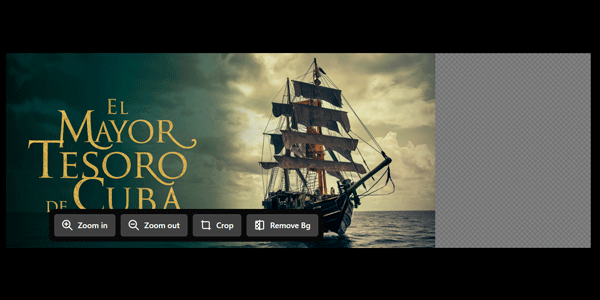
It is not just a matter of sticking it to the left; we can also change the size to focus on what interests us, as you will see later when we add the button.
- We add a prompt if we think it is necessary and expand:
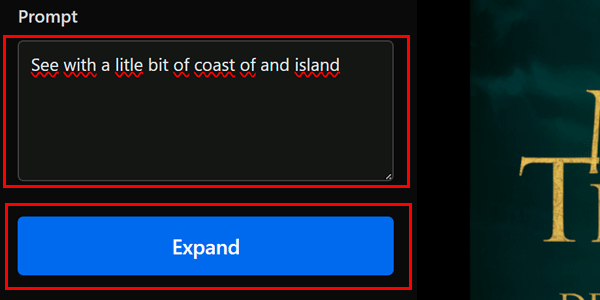
The result:

Just so you know, Freepik offers up to 16 different variations so you can download the one that fits best.
#5. We add the product image with transparent background (the same way as the color)
All that is left is to add the product image with the transparent background using Photoshop or Canva, in the same way we added the gray background.
#6. Result
With this we can consider the banner finished:
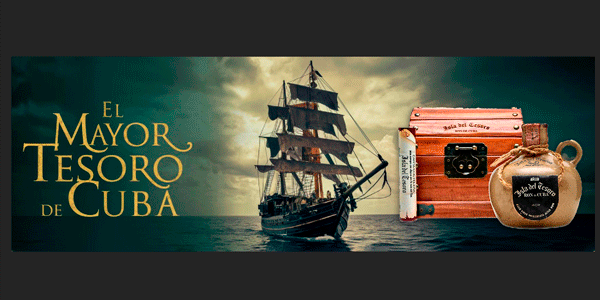
Although you may be interested in the next step…
#7. Add optional elements
You can modify the process I have just explained to adapt it to what you need and add other elements.
Add CTA
If you want to add a button to the banner, you will have to:
- Think about where the button will go.
- Slightly change the framing in Freepik so it fills more of the space:
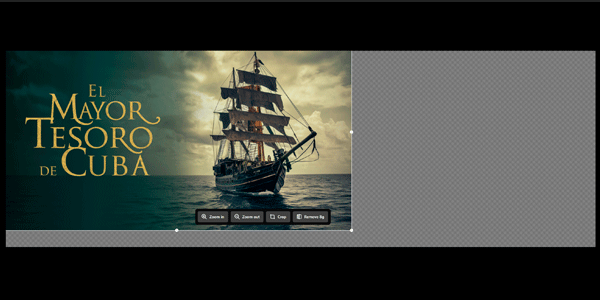
- Add the button in Photoshop, Illustrator, Canva…
The result would be this:
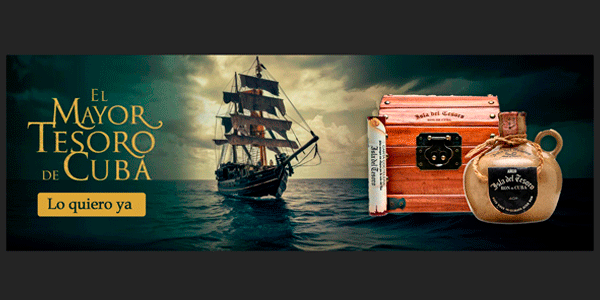
And I do not know what you think, but I find it quite decent
On the other hand, in the same way we added the CTA, you might want to add the brand logo, or use your corporate font for the headline of the banner, in which case you should not add the copy in Ideogram.
This is the general system, and it allows whatever variations you want for your case.
Conclusions
I think that after reading the article it will be fairly clear that, thanks to AI, you do not need to be a great designer—or a designer at all—to create cool banners for your ecommerce.
Mind you, if you are one (a designer), you will be able to get much more out of it, but if you are not, you may not need to outsource every piece in order to get publishable results.
It is really surprising how AI is gradually taking over more and more tasks in our ecommerce.
And that is normal because of the cost savings. As long as you accept that, for now, a good human professional will give you better results.
For now.
Next week we bring this cycle of posts dedicated to creating and promoting products with AI to an end.
It will be a spectacular class, I can tell you that already, because you may be amazed by the social-media videos you can already create.
Seriously, I think it is incredible.
But that will be in the next article, which, if you want to receive it in your inbox, you only have to subscribe here.

Leave a Reply