
As the closing article in this series, where we have relied on AI for everything related to creating and selling products with AI, let’s go through a complete tutorial for creating a social media video.
Of course, with the help of AI.
Note that I’m not saying “with AI”, but using it as support.
There is still human work behind it. Especially if we combine different parts and techniques.
AI, on its own and as of today, is not capable of creating a video people will like for your social media channels or those of your business.
But before starting the full process, which takes some time and several steps, here is the link to all the articles in the series:
- Turn the products in your supplier’s PDF catalogue into product pages in your ecommerce.
- Create the necessary content (descriptions, meta tags…) for those product pages in batches, not one by one.
- Improve one specific product page from the whole batch, which is what we’re going to do today.
- How to create a sales email for the product.
- How to create product images and banners for ecommerce using AI
Now, let’s start with the step-by-step process.
Steps
I already warned you there are quite a few. Nine, to be precise.
Will you need all of them for your creation?
Not necessarily.
You’ll need all or some of them, depending on what you have in mind.
But the aim of the article is to create a complete video that covers as much as possible, so that you know them all and know at which points, and how, you can use an AI tool.
In addition, I’ll explain the guidelines, the high level, of each step. I’m not going to cover how to execute every step, since each one would require an article of its own, and I’ll leave that for later.
What I’m going to show you today is what you can do and the order—or rather, “an” order (mine)—in which you should do it. As well as the results obtained.
What interests me is that you understand the complete process, so you can use it as a base, replicate it and improve it or adapt it to your case.
For this, I’m going to use a video prepared by our colleague Juan Carlos Carpio for Yo pongo el hielo, to which I’ve added a few extra steps.
#1. Idea
Obviously, as with every piece of content you want to create, this is the first step. Without an idea, there’s no video worth making.
So you may already know what you want to make the piece about. But if you’re not sure, you can use a tool such as ChatGPT (or Gemini).
ChatGPT or Gemini
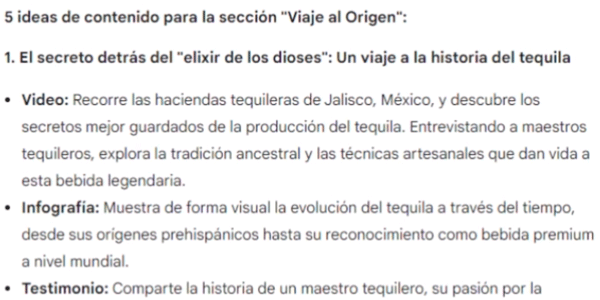
You open it and enter a prompt like this:
I have a social media account where I post content related to premium drinks. On this account I have a section where I talk about the origin of the main spirits and the anecdotes behind their creation. Knowing this, give me 5 ideas for a new piece of content.The result:
Optional: Google Ads Keyword Planner
If, in addition to the video, I want to create a blog article, I can carry out keyword research to see the search interest for each proposed piece of content, as well as the main keywords, so I can optimise it for SEO.
Here you have more information on how to carry out keyword and demand research for ecommerce.
#2. Script creation
Having an idea of what we’re going to create is good.
Having a script is better.
That’s why we’ll use the same two tools as before to create it, since they work very well for what we need.
ChatGPT or Gemini
You can try a prompt like this:
As an expert scriptwriter for social media, I need you to create a script for a video about the origin of gin. The script will be for a video between 1 and 2 minutes long, and I want it to include an interesting anecdote or story.The result:
Understood. Let’s create a script that includes an interesting anecdote about the origin of gin, making sure it is entertaining and educational.
[Start of Video: Image of an old bar and upbeat background music]
Narrator:
“Hello everyone! Today we’re going to dive into the fascinating story of the origin of gin, that classic and refreshing drink so many of us love.”
[Transition to old illustrations of alchemists and distillers]
Narrator:
“It all begins in sixteenth-century Europe. Imagine an alchemist in his laboratory, surrounded by flasks and stills. His name was Franciscus Sylvius, a Dutch doctor looking for a cure for kidney disease.”
[Cut to a portrait of Franciscus Sylvius]
Narrator:
“Sylvius mixed alcohol with juniper berries, known for their medicinal properties. That’s how ‘genever’ was born, which in Dutch means ‘juniper’. Yes, it all started that simply—and medicinally!”
[Transition to an animation of a seventeenth-century Dutch tavern]
Narrator:
“Gin quickly became popular, but this is where the story gets interesting. In the seventeenth century, English soldiers discovered the drink during the Eighty Years’ War and brought it back to England.”
[Cut to an illustration of English soldiers raising a toast]
Narrator:
“They called it ‘Dutch Courage’ because they believed it gave them courage on the battlefield. Imagine those soldiers raising a glass before going into combat!”
[Transition to an image of a bustling English market]
Narrator:
“In England, gin was adapted and became what we know today. It became so popular that in the eighteenth century London was full of small distilleries, and gin was cheaper than beer.”
[Cut to a caricature of the ‘Gin Craze’]
Narrator:
“This led to the famous ‘Gin Craze’, a period when gin caused social havoc due to its uncontrolled consumption. The government had to step in and regulate production.”
[Transition to an image of a modern gin bottle]
Narrator:
“Today, gin has come a long way. From a medicinal remedy to a symbol of sophistication, it has always retained its essence.”
[Cut to an image of a gin cocktail]
Narrator:
“So next time you enjoy a gin and tonic, remember that you’re drinking a piece of history. Cheers!”
[End of Video: Image of the channel logo and a call to action]
Narrator:
“If you liked this story, give it a like, subscribe and share it with your friends. See you next time!”
Notice that, in addition to the text itself, it also suggests a series of visual resources to accompany each fragment. You don’t even have to think about it, just create it, saving us a lot, a lot of time.
#3. Voice-over
More or less everyone is used to what ChatGPT can do. But what we’re going to do now goes one step further.
One that will surprise you the first time you see it.
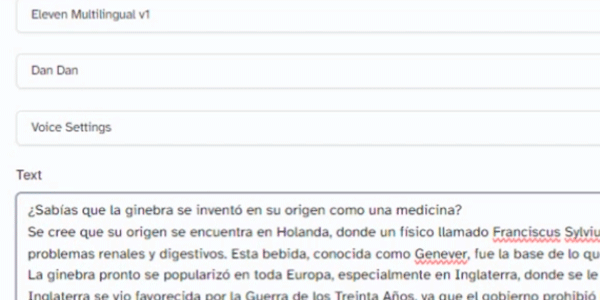
ElevenLabs
We’re going to use this tool to paste in the ChatGPT script and have it narrated, with our own voice or another one that we choose. Or even one we create:
#4. Avatar creation (optional)
This step is not mandatory. Depending on what you have in mind, showing a narrator on screen who “explains” what is happening in the video may or may not fit. We’ll call this narrator an “avatar”.
If you think adding this narrator is a good idea, there are two options:
- Show an avatar of yourself.
- Create one specifically for the occasion.
HeyGen
If you choose to create your own avatar, we’ll use this tool, which we’ll talk about more in the next step.
Ideogram
If, on the other hand, we want to create a different or “non-human” avatar, we can use several tools, but the one giving me the best results is Ideogram.
So first we’ll devise a 2D character or a 3D render (“Pixar” style), which, magically, we’ll animate afterwards:
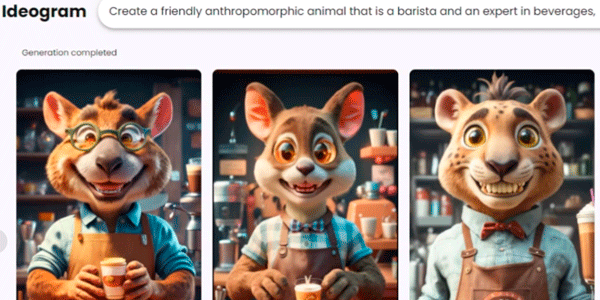
Important: it is preferable for the avatar background to be white so we can remove it in later steps.
#5. Avatar animation (optional)
If we have decided to add an avatar—ours or an invented one—this step will be mandatory. If we don’t need one for our video, we can skip it.
In any case, I recommend taking a look at this tool because it is very, very powerful, although it isn’t cheap.
HeyGen
The process is as follows:
- Upload our avatar (or use the one we created of ourselves in this same tool).
- Upload the audio generated for us by ElevenLabs.
- Export the video.
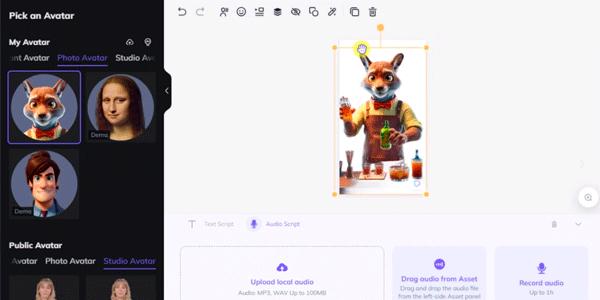
As I said, seeing how our character’s face animates, the lips sync, it blinks, etc. is impressive.
For now there is no animation of the limbs (arms or legs), which would round things off even more, but well, I’m sure we’ll get there.
#6. Subtitle syncing and background removal (optional)
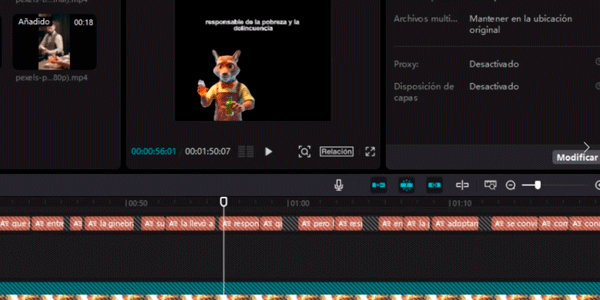
Now we’re going to use TikTok’s video editor for these two steps.
CapCut
It’s ideal for these two actions.
- Create and synchronise the subtitles of the video.
- Remove the background white background from the avatar video, so that the character is in the foreground and integrated into the edit.
I say these are optional because, although adding subtitles is common in social media videos, it isn’t mandatory.
Likewise, if you don’t want to include an avatar, you won’t have a background to remove.
If you choose both, TikTok’s video editor makes life much easier, and we can also use it to assemble the entire final video:
#7. Video generation
If you remember, the script ChatGPT generated for us already included the images it recommended adding to the video. Now it’s time to do it.
Just so you know, as of today (July 2024), AI isn’t there yet. At least not for large-scale commercial use, but even so, let’s see what can be done.
Runway
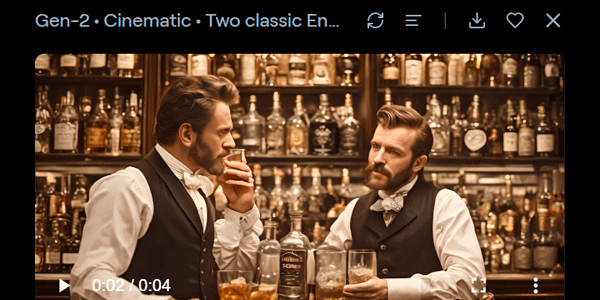
It lets you create short videos, either from text (a prompt) or generated from an image or video. Used together with the next step (creating still images), it’s a powerful combo.
For short videos (between 4 and 10 seconds), it can work. Especially if you’re looking for videos with little movement from the main subjects.
That said, be clear beforehand that you’ll need to generate quite a few of these videos if you want to cover the entire original script:
Video libraries
In reality, as of today, when generating your video, you’ll probably use this route more than the previous one, given the difficulty of getting the videos you want through AI.
Let’s see whether, when they open Sora, what it actually offers is an improvement over the current state of things.
For now, here is a list of some free or freemium options:
#8. Background images
A useful resource you should know and will use is still images in the video.
We’ll give these images some movement through pans and zoom in or out, so that the video doesn’t feel “static”.
For image creation, although MidJourney is the best, because of its cost I recommend using two other tools.
Copilot or Ideogram
We’ve already used the first one before and the second works the same way: enter the prompt and it generates the still image:
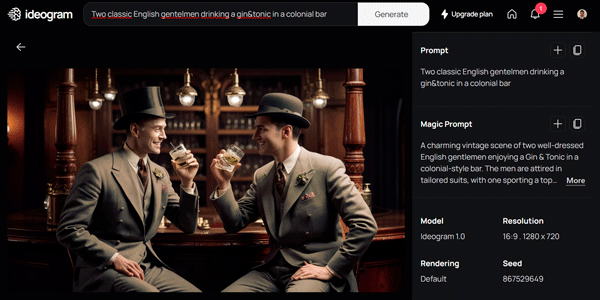
But as I mentioned, besides using it on its own, you can use it as the basis for a short video in Runway:
Not bad at all, the result of this process.
#9. Editing
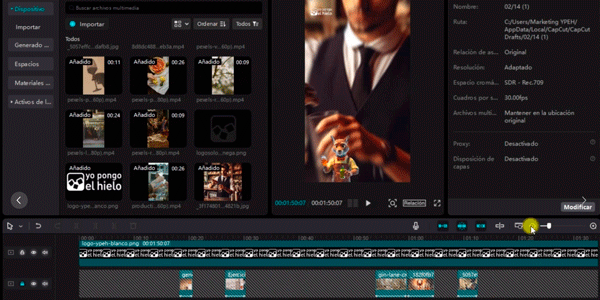
Once you have all the necessary assets (audio, videos, still images, subtitles…), it’s time to put everything together.
Sadly, AI isn’t going to do it for you. This step is completely manual.
I’ll leave you the two tools I use, although some people opt for DaVinci Resolve, and from what I’ve seen of it, if I had to start with one, that might actually be the one…
CapCut or Premiere
Normally, if you have subtitles and removed the video background in CapCut, for convenience you’ll keep using this tool for the final edit. That way you avoid exporting back and forth.
In addition, it’s much easier for adding the typical effects used in social media videos.
However, if you prefer a more sober and classic editor, Adobe’s solution has everything you need and many more professional-grade options.
Here, you’re the one who decides.
My advice?
If you’ve never edited in your life, start with TikTok’s.
If you already have experience and are looking to create more professional videos, with more options and fine-grained control over all the codecs and similar matters, go with Adobe’s. You’ll have an arsenal of tools at the cost of a considerably steeper learning curve.
Result
Here is the final video, so you can see the quality of what can be generated in a couple of hours if you know how to use these tools.
Part 1:
And the second part:
Conclusions
I mentioned at the beginning that there were quite a few steps, depending on the video you want to produce, although obviously they can be simplified considerably if you remove things like the avatar.
From my point of view, the level of quality achieved is more than adequate for social media, where above all we’re trying to entertain people. Especially considering that the person who carried out this work had no previous knowledge of the subject covered by the video.
Thanks to AI, they have done a great job in just a few hours, making the power and current state of AI tools aimed at content creation very clear.
Of course, besides video, you can create other pieces, such as:
- Carousels on Linkedin.
- Twitter threads.
- Fully automated videos (but with terrible quality).
- Or songs like this one, from our 10th Anniversary:
Which I don’t think is bad at all either.
We’ll talk about each of these cases in future articles.
For now, I’ll leave you with the complete process for using AI applied to ecommerce products:
- Turn the products in your supplier’s PDF catalogue into product pages in your ecommerce.
- Create the necessary content (descriptions, meta tags…) for those product pages in batches, not one by one.
- Improve one specific product page from the whole batch, which is what we’re going to do today.
- How to create a sales email for the product.
- How to create product images and banners for ecommerce using AI
- Content for social media (this is the article you’re reading).
I hope you enjoyed the series.
If so, you can receive a new article about AI—and other topics related to digital business—in your inbox every Thursday if you subscribe here.
And while you’re there, you can download a resource you like from that page.

Leave a Reply