
Email is the digital channel that requires the least technical setup. That is how I see it.
But requiring the least does not mean requiring none: there are still a few things you need to do.
And that is what I am going to explain in this fifth lesson of the Acumbamail course, but first, let me recap what we have covered so far:
- In the first lesson, I explained the reasons for choosing Acumbamail.
- In the second, how to sign up for the tool (for free or while saving money on the paid plans).
- In the third, we saw how to create lists and import subscribers.
- In the fourth, the one before this, I explained how to create the subscription form.
And in this fifth one, I am going to tell you about the technical settings you need to make. Apart from adding the sending domain to your Acumbamail account, the rest are not configured in the tool itself, but in our hosting.
These settings involve adding what are known as “DNS records”, which tell the major ESPs (the email service providers, such as Gmail, Outlook, Yahoo and Amazon) that messages sent from the tool using an account on my domain (such as newsletter@midominio.com or any other address) are trustworthy.
This will stop these ESPs from classifying our messages as spam and help them reach your users’ inboxes.
To do this, we need to configure three records on our server for the email tool:
- SPF: not required in Acumbamail, although it is in other tools.
- DKIM: this requires adding and validating the domain from which we will send emails in the email tool, and then adding a record on our server.
- DMARC: another DNS record on the server, configured with various parameters.
Here is the outline of the full process I am going to explain:
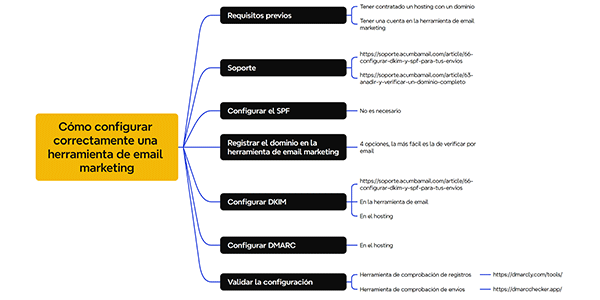
And first, here it is on video:
Then in text, in case you prefer reading.
Índice de Contenidos del Artículo
Prerequisites
Before we get into the process itself, you should know that you need two things to set this up:
- To have hosting and a domain, which is where we will add the DNS records.
- To have an account with the email marketing tool. With Acumbamail, it has to be a paid account (with MailerLite, for example, the free one is enough).
Important: if you use a CDN such as Cloudflare, you will most likely need to configure the DNS records there rather than in your hosting.
Now, let us get started step by step.

#1. Register the domain in Acumbamail
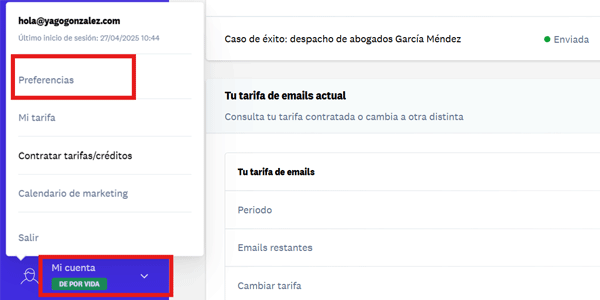
Go to your account (a paid one, remember) and click Preferences:
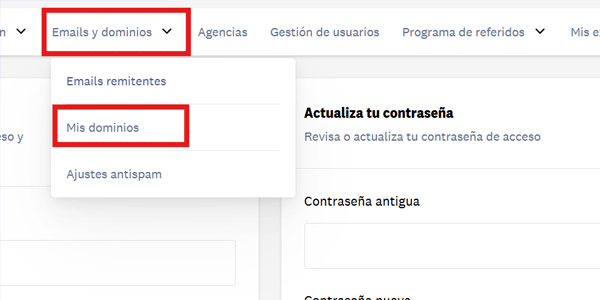
Once inside, go to Emails and domains > My domains:
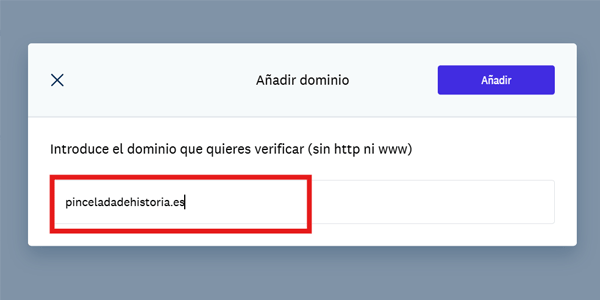
Add the domain:
Click Verify and choose one of the four methods:
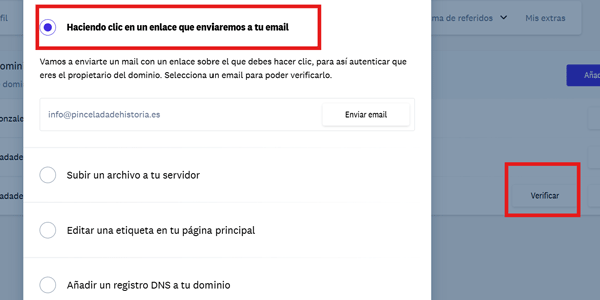
The easiest and quickest option is to send ourselves an email at one of the addresses suggested by the tool.
Since these are the most common addresses, one will probably match an email account we have already created, so we select the right one and send ourselves the email.
When it arrives, click:
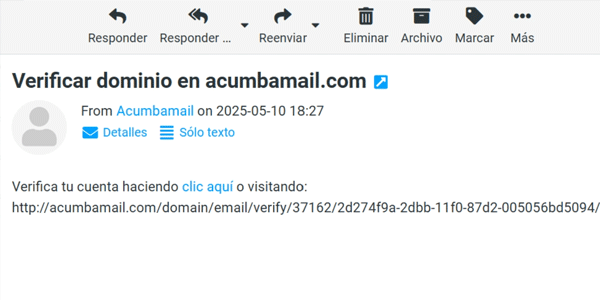
If none of the email accounts happens to match one of ours, we will use any of the other three methods, which are also straightforward, although you will need a little technical knowledge.
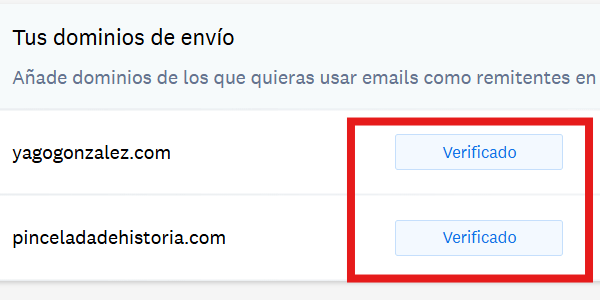
The point is to get the domain verified :
#2. Configure DKIM
Now that the domain is verified, we can configure DKIM.
To do this, go to Emails and domains > Anti-spam settings:
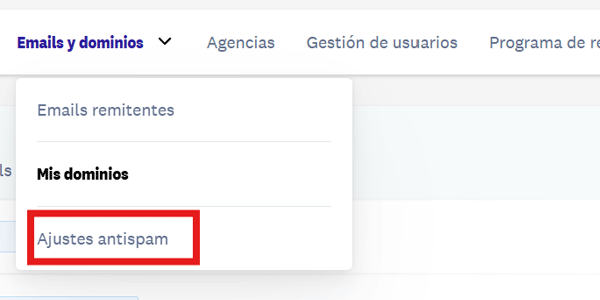
Here, in the DKIM section, we can see three things:
- The DNS record type that must be created in the hosting: CNAME.
- The name of that record: : acumbamail._domainkey.midominio.com.
- The record value: dkim.acumbamail.com.
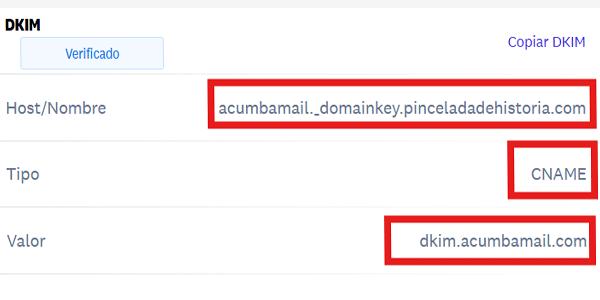
With these details, go to our hosting control panel (outside Acumbamail), to the DNS section and create the record there:
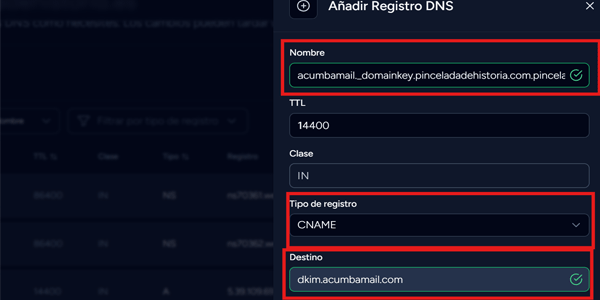
That is done. Now we repeat the same process for DMARC.
#3. Configure DMARC
In Acumbamail, next to the DKIM record values, you will find the DMARC record values:
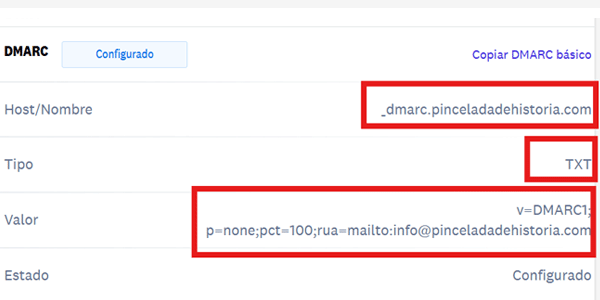
We can leave the default value as it is (v=DMARC1; p=none), but, as you can see in the image, I have added two more.
This is because, if we want 100% validation from sending tools, we need to add the parameters pct and rua.:
v=DMARC1; p=none;pct=100;rua=mailto:info@pinceladadehistoria.com
The email account in the rua parameter is where the ESP reports containing information about the status of the messages will arrive.
You can use any email account you like; it does not have to be the same one you will send from. In fact, I suggest using a secondary account or setting up a filter, because you will receive several emails a day here and it can get annoying.
Here is an example of these information emails:
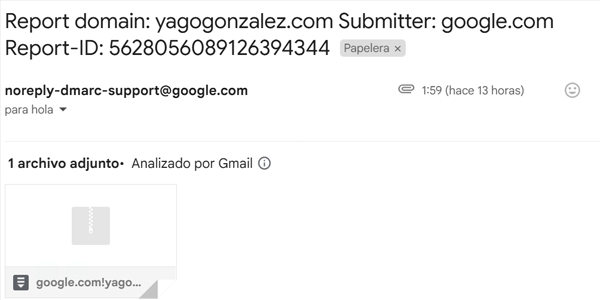
Now, just as before, create the record in the hosting control panel:
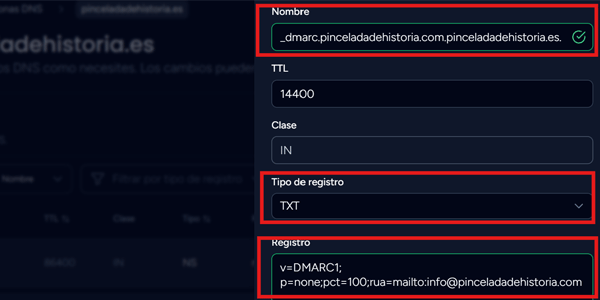
Important: you may already have a record of this type in the panel, so check before adding it and edit the existing one instead of creating a new one.
#4. Validate the configuration
First, from the Acumbamail account itself, by clicking here:
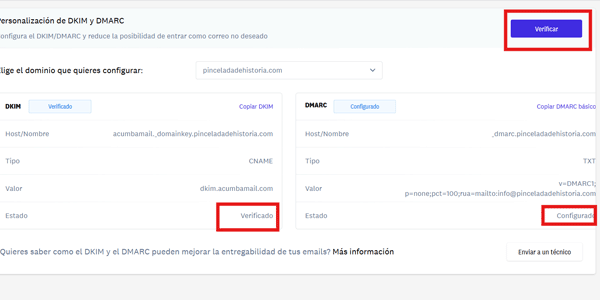
And now we will do it with two independent tools.
Record-checking tool
We will use this one: https://dmarcly.com/tools/
We will verify each record here:
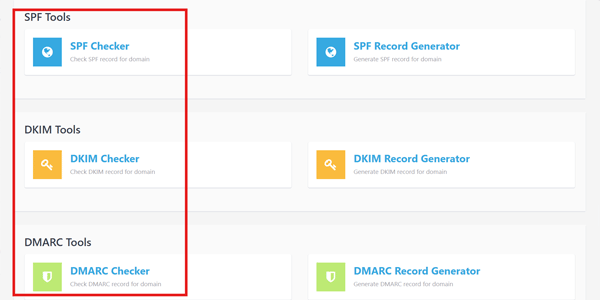
If you have done it as I explained, they will all pass correctly.
Sending-check tool
And we are going to do a double-check with another tool. This time, we will check the headers sent by email.
For this, we will use this other tool: https://dmarcchecker.app/
Here, simply:
- create a campaign (an email) in Acumbamail.
- Select a list, but do not send the email to the list; instead…
- Send a test email to this email account:
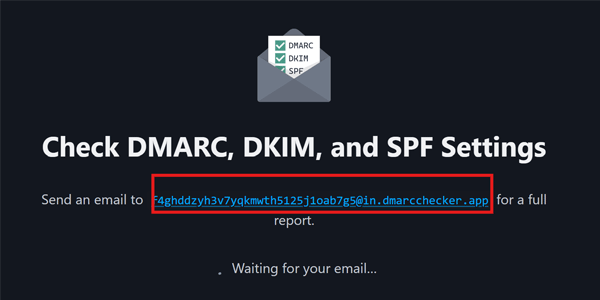
After a few seconds, while Acumbamail sends the message, the tool will receive and analyse it, and we will get the results.
Again, if you followed every step, including the extra DMARC parameters, you should have no problems and will be ready to send quality content without it landing in spam.
Conclusions
The most important point: this setup makes ESPs look more favourably on your email campaigns, but they are not blind. In other words, if the content you send is spam and users mark it as such, this technical setup will not work miracles: your messages will land in spam or may not be delivered at all.
It makes sense, right?
On the other hand, if this is your first run-in with DNS records, you will have seen that it is not difficult, but in any case you can always ask for help from both your hosting provider and Acumbamail support.
Speaking of which, here are the tool’s two support URLs with more information on this topic:
And if, after all that, you are still stuck, you can always contact me and I will configure it for you for a modest fee.
If you liked the content, you can find more articles about Acumbamail here, plus a new article about digital business in your inbox every week if you sign up here..
And if you prefer video, here is my YouTube channel, with tutorials, guides and content on what I know best: digital business.
See you. Hopefully soon.

Leave a Reply