
Let’s move on to the second lesson in the Acumbamail course, where I show you how I use this tool in my own business.
In the first video of the course, I explained how to sign up for Acumbamail.
Once you have taken this first step, there are two possibilities:
- You have previously used an email marketing platform and already have a subscriber list (in other words, you are migrating from another tool).).
- You are just getting started with email marketing and Acumbamail is the first tool you are using, so you will not need to import a list; you will create one with a form instead.
This tutorial is only for you if you are in the first situation. If you are just starting out, skip it.
In the next article we will cover the second situation, which does apply to everyone..
So, if you are going to import a list, this video shows you how to do it quickly and easily:
I also explain the three steps below, in case you would rather read them than watch the video.
Índice de Contenidos del Artículo
#1. Create the list
The first thing to do is create a list, which is where your subscribers will be imported:
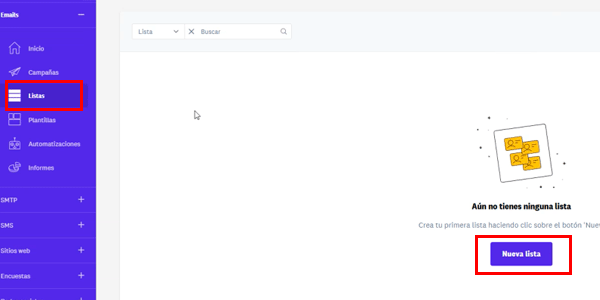
#2. Import your subscribers
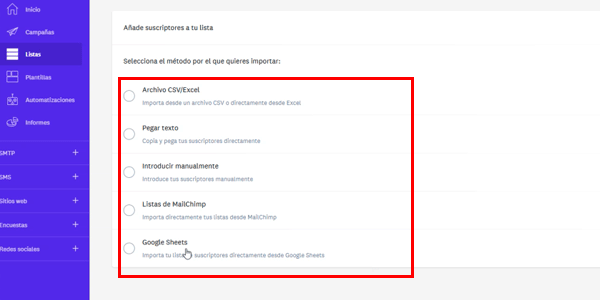
Next, import your email list. You will see several options here, although they are all very easy:
- Using a CSV or Excel file.
- Pasting the emails directly..
- Adding them one by one manually (only advisable if you are adding a single email account).
- Importing a list from Mailchimp, if that was your previous tool.
- Importing the list from Google Sheets, if you have it saved there (useful if you use this tool as a backup of your users’ email addresses).
Except for the Mailchimp option, which requires an API key, the others are straightforward and you should have no trouble adding your users to Acumbamail.
Buuut, there is one little thing you still need to know…
#3. Create and map the required fields
There is one final step left: mapping the fields.
What we do here is tell the tool which list fields should store each subscriber’s values.
Of course, if you use several fields, you will need to create them in the list when importing subscribers through a CSV file:
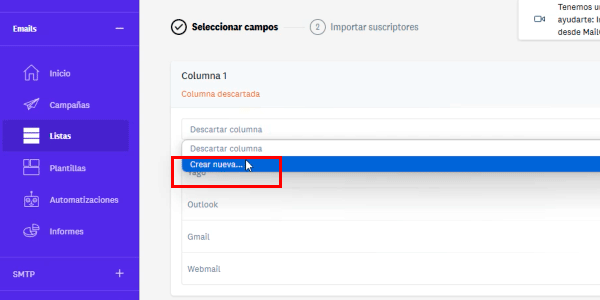
For example, I used these four fields when I migrated from another tool:
- Name.
- Email.
- Subscription date: when they joined my list on my previous email marketing platform.
- Privacy consent: whether they had ticked the consent checkbox (this field has a small catch, so I will make a separate video to show you how to handle it).
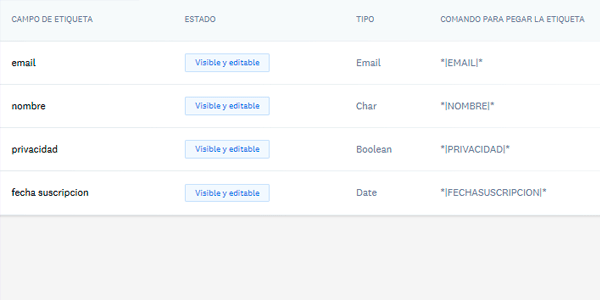
When creating the fields, be aware that the naming matters A LOT, especially if you later want to move users between lists. Pay attention to uppercase and lowercase letters, accents and every other detail.
If, on the other hand, you do not use any extra fields and only use the email field, you can forget this part.
Once you click the import button, you are done and something like this will appear:
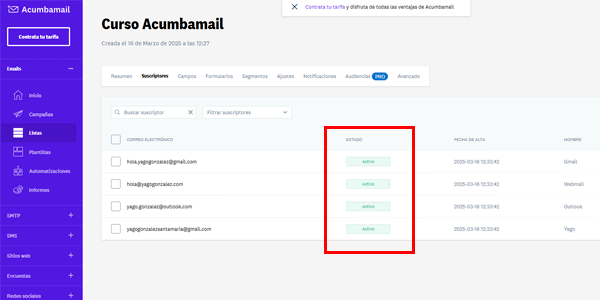
You can now start sending emails to this subscriber list. Before doing so, though, I recommend checking that your domain’s DNS has been configured correctly.
I will cover that in upcoming videos, which you can watch on my YouTube channel or have sent to your inbox by subscribing here..
See you in the next video of the course.






Leave a Reply