
In a previous article I explained how to install Stable Diffusion on your PC in several ways.
But the version available at the time was 1.4.
Newer versions have since appeared, such as 2.0 and 2.1. And they are better.
So I think upgrading will be worth your while.
I am going to show you how.
Download the required files
The first thing is to download the two files required for each new version, so head to the Automatic1111 repository.
Click the first link we need, the model+yaml for version 2.1:

It takes us to the website of Hugging Face, where the official models are stored.
Downloading the model
On this website, the first thing to do is download the trained model, so click here:

It takes us to the download page, where we click download:

A download of 5 GB will begin, so make sure you have enough disk space.
The file may have the extension ".ckpt" or ".safetensor". Both are valid. Check this before continuing.
Downloading the .yaml file
Besides the model, you also need a properties file with the ".yaml" extension.
This file with such an unusual extension is simply a text file containing the model's configuration parameters.
To download it, go back to the previous page, but this time click this other link:
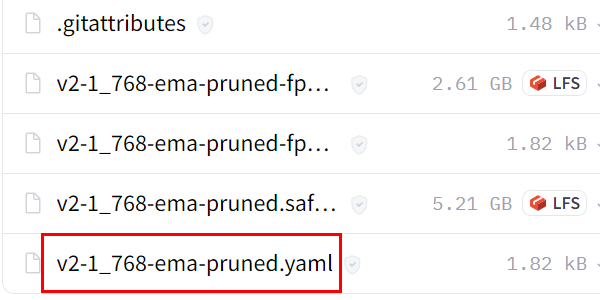
This opens a page showing the contents of the small file.
The easiest way to download it correctly is to right-click the link labelled "raw" and select "Save link as…"“:
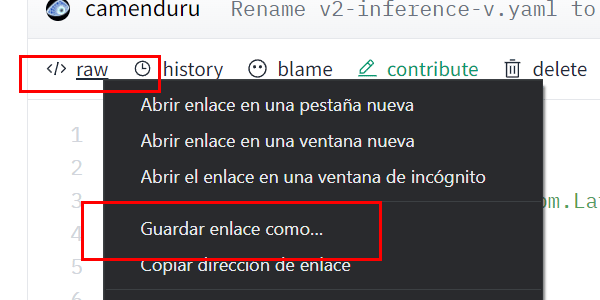
A Windows window will open so you can choose the folder where the .yaml file will be downloaded. I recommend saving it in the same folder where you saved the model (the 5 GB file you downloaded earlier).
Pasting the files into the correct location
There is just one final step: take the two files we have just downloaded and paste them into the corresponding folder.
To do this, go to the root folder where you installed Stable Diffusion and navigate to "models > Stable-diffusion" and paste them there:

That is it. All that remains is to launch the application and check that it works.
Testing Stable Diffusion 2.1
Open the application as usual and select the downloaded model from the drop-down menu:

Before running the prompt, one thing:
See that 768 in the file name?
That means the model will work correctly with images of that size, not smaller ones. So change the size here:

Once you have made this adjustment, you can run it. Everything should work as expected, at least if you have a reasonably decent graphics card (in AI terms).
What happens if you do not?
It will run out of vRAM while generating the image.
Do not worry, though: there is a solution.
Installing Stable Diffusion 2.0 on less powerful graphics cards
If your graphics card has at least 4 GB of vRAM there is a way to use this new version.
It is also quite simple, as it consists of repeating the same steps we have just followed, buuut selecting this other model:

And this other .yaml file. Remember to right-click and choose "Save link as…":
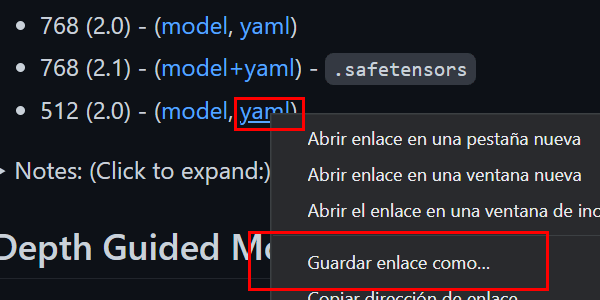
Once they have been downloaded, all you need to do is:
- Paste them into the same folder as the previous files.
- And rename them so that they have the same name, each with its corresponding extension:
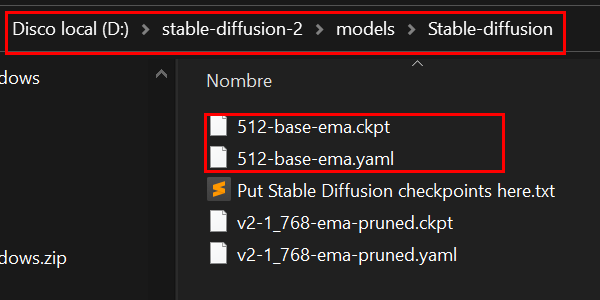
You can now launch the program again and check that Stable Diffusion 2.0 is working correctly and creating 512 px images:
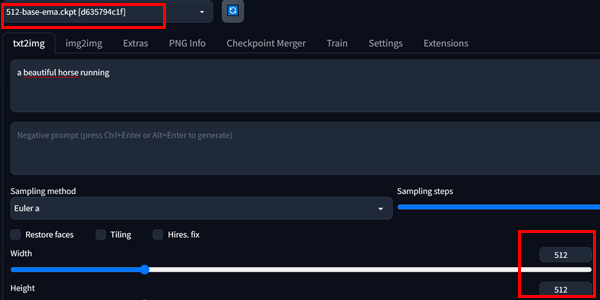
Using a prompt as simple as the one shown in the image above will produce results like this:

Enjoy it.

Leave a Reply