
If you run a Super Nintendo, Mega Drive or Neo Geo game today in a modern emulator, you can get an absolutely sharp image in which every pixel occupies a perfect square.
Pixel perfect, as people usually say.
The problem you have probably noticed is that that is not exactly the image you saw when you played in the 80s and 90s.
There are several reasons, which we will go through throughout the article, but I can already tell you that taking that emulator, enabling a “CRT filter” that adds some black lines and a bit of blur is not playing with “the original CRT look”.
Basically because there was no single CRT look.
The same Neo Geo game could be running:
- On an MVS board connected via RGB to an arcade monitor.
- On a Japanese Neo Geo AES at 60 Hz connected via RGB to a home television.
- On a European AES at 50 Hz plugged in via composite video or even RF.
The game was basically the same, but the image you saw was not.
And then, what did classic video games really look like?
To answer that, we have to follow the entire path of the image: from what the console was capable of generating to what finally appeared on the television in your home.
And there are many variables in the equation, which we can group into six major factors:
- The graphics capabilities of the machine itself: resolution, colors, sprites, memory and the other characteristics that determine what image it can generate.
- The geometry used to display that image: because, as we will see, the points generated by some consoles did not end up being represented as square pixels.
- The connection used: RGB, S-Video, composite video or RF could carry the same graphics with quite different visual results.
- The screen: an arcade monitor did not look the same as a small home television or a good Trinitron connected via RGB.
- The refresh rate: mainly the famous 50 Hz of European PAL versions versus the roughly 60 Hz of Japan and the United States.
- Overscan and the CRT's own adjustments: which could make even two televisions show a slightly different area of the same game.
Put another way, one thing was the image generated by the console and another was the result we got after it went through this whole chain before reaching our eyes.
For example, the usual resolution of a Mega Drive game was 320 × 224 pixels. A Neo Geo game was also 320 × 224.
But anyone who has seen a Metal Slug running alongside the -excellent, by the way- Gunstar Heroes on Mega Drive knows that graphically they were not on the same level.
The first conclusion is simple: resolution matters, but there is no fucking way it explains a console's graphical quality by itself.
I sum it up in one image; click it to see it larger:
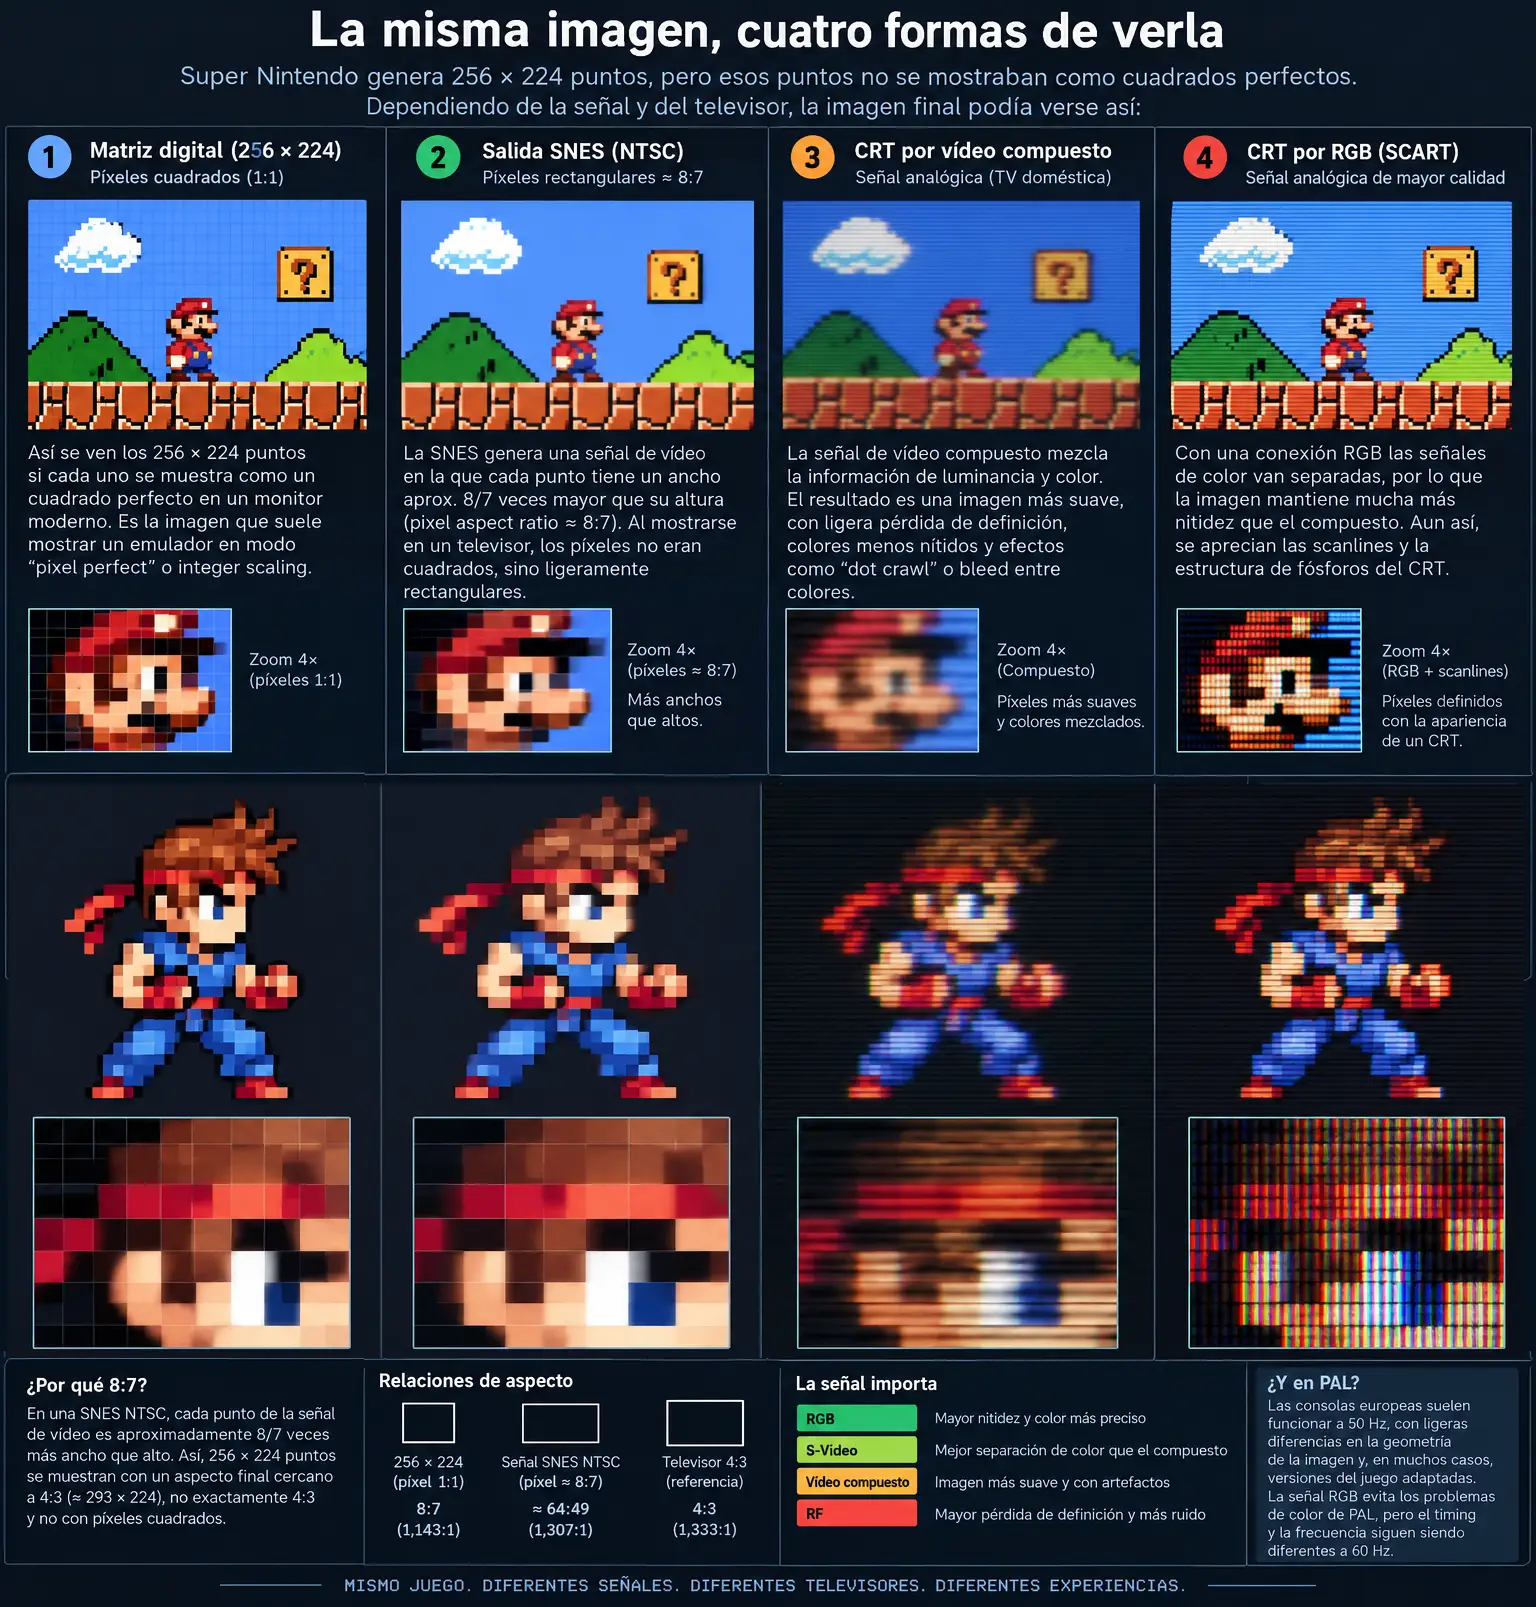
Now, let's look at everything in more detail.
First, what image was each console capable of generating?
Let's start with the easiest things to measure: resolution and colors.
The following table is not intended to list every graphics mode available on each system, because some of these machines could work at several resolutions or use special configurations.
I have included the most common ones because they are enough to give us a reasonable idea of the differences.
| System | Typical width | Typical height | Available palette | Approx. simultaneous colors. | Typical display |
| NES | 256 | 240 | ~54 usable colors | ~25 | CRT TV |
| Super Nintendo | 256 | 224 | 32.768 | up to 256 | CRT TV |
| Mega Drive / Genesis | 320 | 224 | 512 | ~61-64 | CRT TV |
| Neo Geo AES/MVS | 320 | 224 | 65.536 | up to 3.840 | CRT TV / arcade monitor |
| Capcom CPS1 | 384 | 224 | 65.536 | up to 4.096 | Arcade monitor |
| Capcom CPS2 | 384 | 224 | huge internal color space | up to 4.096 | Arcade monitor |
There are quite a few nuances behind those numbers, but for our purposes we do not need to go too deeply into them. The important thing is to see that two machines can share a resolution and still produce radically different visual results.
The clearest example is the one I mentioned at the beginning. Mega Drive and Neo Geo could both work at 320 × 224, but Sega's console had a palette of 512 colors and normally used around 61 simultaneously, while Neo Geo could choose from 65.536 and display up to 3.840 at the same time.
To that we have to add the number and size of sprites it could move, the memory available in each cartridge and the rest of its graphics capabilities.
That makes it much easier to understand why Metal Slug had such an imposing visual presentation, with highly detailed characters, explosions, vehicles and a huge number of sprites on screen within the same 320 × 224 pixels.
In other words, resolution determines the size of the canvas, but not everything you can paint on it.
It also explains something curious about Capcom's arcade boards. CPS1 and CPS2 commonly used 384 × 224, a horizontal resolution even higher than Neo Geo's, but those 384 points were not meant to form a huge panoramic image as would happen today with square pixels.
They ended up being displayed on arcade monitors with a ratio close to 4:3, so their points were physically quite narrow and the pixel and detail density of the image increased.
We will come back to that, because it is one of the most confusing parts of this whole topic.
Las portátiles son un caso diferente
Handhelds are a different case
| Sistema | Resolución | Pantalla |
| Game Boy | 160 × 144 | LCD |
| Game Gear | 160 × 144 | LCD |
| Game Boy Advance | 240 × 160 | LCD |
| Nintendo DS | 256 × 192 por pantalla | LCD |
La diferencia no está simplemente en que utilicen otra resolución, sino en que Nintendo y Sega controlaban tanto la imagen generada por el hardware como la pantalla física donde iba a mostrarse.
The difference is not simply that they use another resolution, but that
A Game Boy Advance has a 240 × 160 panel and the software works specifically for that screen, so there is a direct correspondence between the points generated by the console and the LCD pixels.
That did not happen with a Super Nintendo
The console was connected to an independent analog display, which could be a fairly mediocre 14-inch television, an excellent 29-inch Trinitron or any device in between.
And what does that imply?
SNES's 256 × 224 pixels were not 256 × 224 squares
This is one of the concepts I found hardest to understand when I started researching the subject, because we are far too used to thinking in terms of the pixels on a modern monitor.
A modern screen works with square pixels. So if an emulator shows an SNES image at 256 × 224 pixels without distorting it, each original point is represented as a perfect square.
That is what is known as integer scaling .
The problem is that a real SNES did not display those points as squares on a CRT television.
The console did not send a digital image to the television as we do today with HDMI, but an analog signal. And because of how that signal worked, each point ended up looking
That is why an SNES image shown today with perfectly square pixels does not have exactly the same proportions it had on a television at the time.
To give you an idea, the
- 256 × 224 con píxeles cuadrados: reproduce exactamente la matriz digital generada por la consola.
- Imagen algo más ancha: reproduce mejor las proporciones con las que esa señal terminaba apareciendo en un televisor NTSC.
A somewhat wider image: better reproduces the proportions in which that signal ultimately appeared on an NTSC television. de un emulador no está mal. Simplemente reproduce fielmente los datos originales, pero no es la forma exacta con la que los veíamos en un CRT.
Therefore, an emulator's pixel perfect mode
And there was still another small difference: CRT televisions often hid / cropped part of the edges through overscan.
So far we have talked mainly about pixels and their geometry. We still have not reached one of the elements that changed the final image quality the most:
RGB, S-Video, composite video and RF do not offer the same image
This will probably sound much more familiar if you lived through that era, even if back then we did not know exactly why it happened.
The same console could be connected using several kinds of signal and the result was considerably different. Simplifying quite a bit, because there are exceptions depending on the machine and television, we can rank the usual analog connections from highest to lowest
RGB > S-Video > composite video > RF
Strictly speaking, I am using the word fidelity here rather than graphical quality, although in my opinion the two go very much hand in hand.
A Mega Drive connected via RF does not generate worse graphics than another connected via RGB. Sega's graphics chip is still doing exactly the same job; what changes is how much information we preserve along the path from the console to the screen
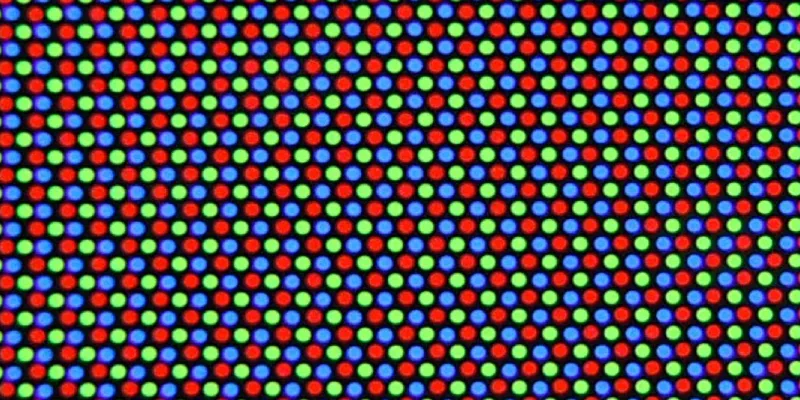
S-Video (o Super Video) combina algo más la información, pero todavía mantiene separadas luminancia y crominancia (luz y color).
S-Video (or Super Video) combines the information somewhat more, but still keeps luminance and chrominance (light and color) separate.
With composite video color, brightness and synchronization travel together, which introduces loss of definition and various artifacts. vuelve a modular toda esa información para enviarla como si fuera un canal de televisión junto con el sonido.
No todas las consolas ofrecían las mismas posibilidades. Una NES normal, por ejemplo, estaba limitada de fábrica a vídeo compuesto y RF, mientras que una SNES ya podía generar RGB, S-Video y compuesto.
Not all consoles offered the same options. A standard NES, for example, was factory-limited to composite video and RF, while an SNES could already generate RGB, S-Video and composite.
Mega Drive also offered RGB, although curiously not S-Video, and later machines such as Saturn or PlayStation could output all three signals. In addition, the region and the specific console revision could change these possibilities.
And just because the console could generate a signal did not mean it was commonly used. Mega Drive, SNES, Neo Geo, Saturn or PlayStation could output RGB in both PAL and NTSC versions, but in Europe we had an important advantage: SCART made it relatively common to find home televisions capable of accepting it. In the United States, where SCART practically did not exist, RF, composite video and, later, S-Video were the norm.
If you ever connected a console through the antenna input and later tried that same machine via RGB, the jump in quality is quite noticeable.
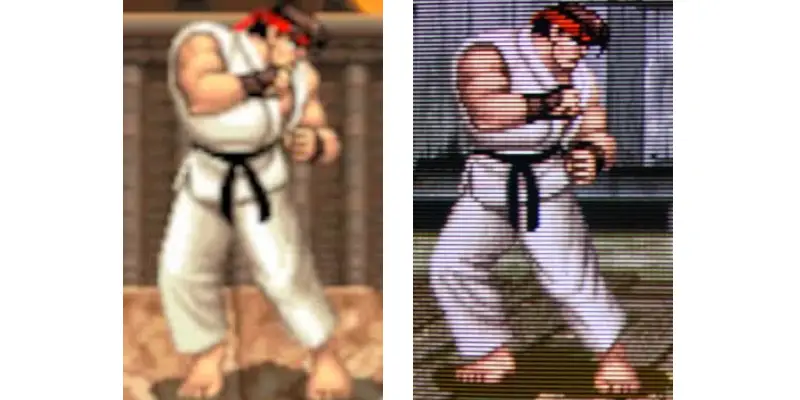
Eso sí, una señal técnicamente peor no tenía por qué producir siempre un resultado visual menos convincente. Algunos desarrolladores llegaron incluso a aprovechar las imperfecciones del vídeo compuesto para generar efectos gráficos determinados.
That said, a technically worse signal did not always have to produce a less convincing visual result. Some developers even took advantage of the imperfections of composite video to create certain graphical effects.
We will return to that later, because before then there is another important part of the chain to cover.
SCART or Euroconnector
Here it is worth clearing up a common confusion: SCART or Euroconnector is not a type of signal like RGB or composite video, but the physical connector through which different video signals can travel
In other words,
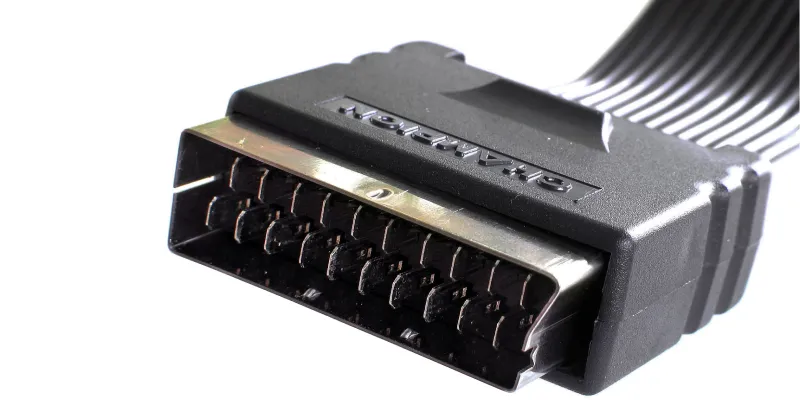
Cuando utilizábamos RGB había un único cable entre la consola y el televisor. Lo que ocurría es que el euroconector tenía 21 contactos y, dentro del cable, las señales roja, verde y azul viajaban por conductores separados, junto con la sincronización, el audio y otras señales de control. Así llegaban separadas hasta el televisor, en lugar de mezclarse previamente en una única señal de vídeo.
When we used RGB there was a single cable between the console and the television. What happened was that the Euroconnector had 21 contacts and, inside the cable,
- Que la consola pudiera generar una señal RGB.
- Que utilizáramos un cable SCART preparado para transportarla.
- The console had to be able to generate an RGB signal.
We had to use a SCART cable wired to carry it.
The specific television input had to accept RGB.
In fact, you could find European televisions with several Euroconnector sockets where only one of them supported this signal.
This can be compared with the typical yellow, red and white RCA cables that we also used with many consoles. The yellow cable carried composite video, while the red and white ones were the audio channels. There was no separate RGB here.
To connect those three RCA plugs to a television with Euroconnector, it was common to use a small RCA-SCART adapter. But that adapter only changed the connector type:
Screen quality
The connection was only one part of the problem, because the screen receiving that signal could also change the result enormously, desenfoque, máscaras de fósforo, bloom, curvatura e incluso aberraciones de color. El problema es que estamos agrupando bajo una única etiqueta características que podían variar muchísimo entre diferentes pantallas.
When we select a CRT filter in RetroArch or any other emulator, we can add
A small cheap television connected via RF did not look the same as a home Sony Trinitron using RGB. Nor did that Trinitron look the same as a professional video monitor (PVM) or the monitor in an arcade cabinet.
And, well, it was not common, but you could also connect consoles to CRT PC monitors at the time, with a result completely different from your home TV.
They were all CRTs, but
It is not the same thing, but to give you an idea, it is like comparing a low-end LCD from fifteen years ago with a modern 4K OLED while arguing that both have flat screens.
And to that we have to add another variable that was especially important for those of us who played in Europe: 50 Hz.
PAL, NTSC and Europe's 50 Hz problem
Japanese and US consoles normally ran at around 60 Hz, while European versions were designed for the 50 Hz of our television system.
And yes, although there were exceptions, what that meant most of the time was that PAL games automatically ran 17 % slower, even though they could be adapted to compensate for the difference.
Los que crecimos con versiones PAL de determinados juegos hemos llegado incluso a interiorizar esa velocidad como la normal. Cuando años después pruebas la versión estadounidense a 60 Hz lo notas. Y en cualquier WipeOut, más..
Those of us who grew up with PAL versions of certain games have even internalized that speed as normal. When, years later, you try the US version at 60 Hz, you notice it. And in any WipeOut.
Here we also need to clarify a technical point so we do not mix up concepts. When we use RGB, it is not correct to say “PAL RGB” and “NTSC RGB”. PAL and NTSC are color encoding systems that RGB precisely avoids by keeping the channels separate, no que el color de una esté codificado en PAL y el de la otra en NTSC.
What actually matters when comparing, for example, a European Neo Geo and a Japanese one, both connected via RGB, is
And Neo Geo is a great way to bring all these pieces together.
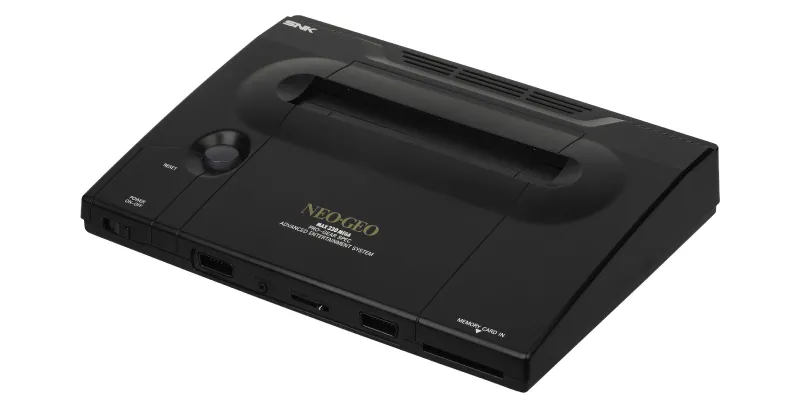
La historia de Neo Geo siempre me ha parecido muy peculiar porque SNK consiguió llevar a casa algo extraordinariamente parecido a su hardware arcade.
I have always found the history of Neo Geo very peculiar because SNK managed to bring home something extraordinarily similar to its arcade hardware.
The professional system was
Hence its completely insane price for the time, by the way.
The good thing is that it is almost a perfect experiment for what we are looking at in this article, because we can keep practically the same graphics hardware and the same games while changing the refresh rate, connection and display to see how much each element affected the result.
That means everyone playing the same Neo Geo game could start from practically identical graphical information and still end up seeing quite different images.
| Configuración | Fidelidad de la señal | Frecuencia | Resultado |
| MVS + RGB + monitor arcade | Excelente | ~60 Hz | Referencia arcade |
| AES 60 Hz + RGB + buen CRT | Excelente | ~60 Hz | Muy próxima a la recreativa |
| AES 50 Hz + RGB + CRT | Excelente | 50 Hz | Imagen limpia, pero timing diferente |
| AES 60 Hz + vídeo compuesto + CRT | Menor | ~60 Hz | Timing correcto, señal degradada |
| AES 50 Hz + vídeo compuesto + CRT | Menor | 50 Hz | Pierde en ambos apartados |
| AES + RF + CRT | La menor | 50/60 Hz | Mayor degradación de imagen |
Cuidado porque aquí no tiene demasiado sentido establecer una clasificación absoluta, ya que hay combinaciones poco comparables.
Be careful, because it does not make much sense to establish an absolute ranking here, since some combinations are difficult to compare.
Which do we prefer: a European AES at 50 Hz connected via RGB or a Japanese one at 60 Hz over composite video? The first gives us a much sharper image, while the second better reproduces the original arcade speed.
Nor will every arcade monitor look better than every home television. A good CRT connected via RGB can provide a magnificent image, far better than an arcade tube with tens of thousands of hours of use behind it.
What we can say is that MVS + RGB + arcade monitor represents the chain for which the professional system was designed.
And here we reach a distinction that I think matters:
I, for example, remember connecting certain consoles via RF, including Mega Drive and Super Nintendo. It was what I had and what I knew at the time. If I connected them today via RGB to a good Trinitron, I would get a much better image than I actually had.
This difference between a technically better signal and the one we actually used leads us to another interesting question.
Dithering and imperfections that could become advantages
Earlier we said that a signal that was worse on paper did not necessarily always produce a less convincing visual result.
The
Mega Drive could use far fewer simultaneous colors than Super Nintendo, and one way to disguise that limitation was to alternate pixels of different colors so that, from a certain distance, our eyes perceived an intermediate tone or even transparency that technically did not exist.
There are some well-known examples in games such as
Pero hay sitios donde canta más.
But there are places where it stands out more.
That said, we should not go to the opposite extreme and conclude that all the pixel art of the era was designed to look blurry. Dithering was also used on computers with quite sharp monitors and on arcade systems connected via RGB. It was a useful graphics technique for overcoming color limitations regardless of whether a particular signal later improved the result. Jurassic Park utilizaron técnicas de pseudo-hires para alternar columnas de información procedentes de dos imágenes diferentes. El suavizado provocado por determinadas señales podía ayudar a mezclarlas visualmente, mientras que con una salida RGB mucho más definida esas columnas podían distinguirse con mayor facilidad.
Super Nintendo has even more explicit cases. Some games such as Kirby's Dream Land 3 .
So
But that does not mean every artist designed each pixel exclusively around how it would look after going through composite video and a home television.
Did artists design with the CRT in mind?
This question is interesting because comparisons between a perfectly sharp sprite and the same sprite viewed with a good CRT shader have become very popular in recent years.
Usually something quite striking happens: in the second image the shadows look softer, gradients appear that we did not see before, and some faces gain volume. It seems so obvious that it is easy to claim that this was exactly the designers' intention.
Ian Fisch raised a quite interesting thread some time ago questioning that conclusion.
One of his examples is
That means that, at least in cases like this, the artist had an original reference that was much sharper than the image the user eventually saw on their television. The sprite was an adaptation of that image to the hardware's limitations, not necessarily a work whose final state only appeared when a CRT blurred it.
- Mediante RGB en un monitor bueno muy nítido.
- Mediante vídeo compuesto en un televisor doméstico.
- Via RGB on a very sharp, good monitor.
Via composite video on a home television.
Via RF on another, much worse set.
If you wanted everyone to be able to play it as well as possible, the graphics had to work reasonably well in quite different scenarios.
The truth is that
Some artists and programmers deliberately exploited the characteristics of the signal and televisions. Others tried to get as close as possible to an original illustration, photograph or render using the graphics resources available to them.
That is why
And at this point the question is: what do we do with all this information?
What is the best way to play these games today
Now that we know all this, we have several alternatives, and choosing one or another will depend on what you want to achieve.
| Si buscas… | Usa |
| Máxima fidelidad al hardware y tecnología originales | Consola original + CRT + RGB |
| Hardware original sin tener un CRT | Consola + escalador específico + TV moderna |
| Máxima fidelidad al hardware y tecnología originales, pero más nitidez | Consola + escalador específico + Monitor de PC CRT |
| Muchos sistemas con una gran fidelidad | MiSTer FPGA + CRT o pantalla moderna |
| Máxima comodidad y posibilidad de experimentar | Emulador + buenos shaders CRT |
| Reproducir exactamente tus recuerdos | Consola + conexión + CRT similares a los que utilizabas entonces |
Profundicemos en cada una de ellas.
Let's look at each of them in more depth.
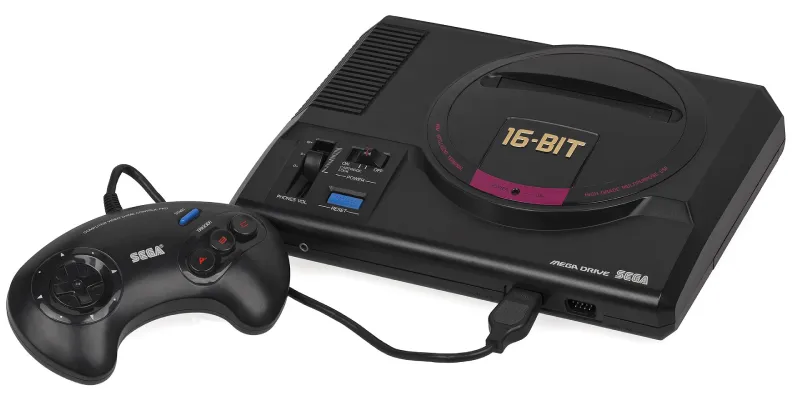
Original console + RGB CRT
For a Mega Drive, SNES, Neo Geo, Saturn or PlayStation, this would be my first choice if the goal is to reproduce the original feel (and we have space to keep the television).
In Europe we are also quite lucky because many home televisions included SCART or Euroconnector with RGB support. That said, you have to check the specific set: having a SCART socket does not automatically mean that input accepts RGB, and I have already explained that using an RCA-SCART adapter does not turn a composite video signal into RGB either.
Also, on machines that suffered poor PAL conversions, you can try to use a 60 Hz configuration where possible.
However, I insist on the earlier nuance:
Original console + scaler + modern television
It is probably the most balanced solution today.
The idea is to keep the console and its original signal, but add a specialized device between it and the modern television that correctly converts that signal to HDMI.
I am not talking about a ten-euro RCA-HDMI adapter, but a video scaler designed specifically for retro consoles, such as RetroTINK or OSSC.
These devices understand signals such as 240p and let you scale them to the resolutions of current displays while maintaining the aspect ratio and minimizing latency.
Some models also let you add scanlines, different masks and other effects to approximate CRT images.
The setup would be:
console > RGB (best) / S-Video / composite > scaler > HDMI > modern television
Personally, I think it is the best option for balancing fidelity, image quality and convenience.
You keep the original hardware, avoid having to keep a thirty-kilo CRT monster and can also decide whether you want an extremely sharp image or something visually closer to a tube display.
That said, decent devices start at around 50€ and up and, because they are used with televisions based on current technologies (OLED, LCD), they do not match the motion clarity of a CRT.
Original console + scaler + CRT PC monitor
It is a less common alternative, but one that can produce spectacular results: connecting the original console to an old computer CRT monitor.
The problem is that an SNES, Mega Drive, Neo Geo, Saturn or PlayStation normally generates a signal of around 15 kHz and resolutions such as 240p, while common VGA PC monitors were designed to work from roughly 31 kHz upwards. In other words, even though both are CRTs and we may be using RGB, we normally cannot connect the console directly to the monitor with a simple cable.
We need a scandoubler or scaler that transforms the original signal into one compatible with the monitor. For example, a device such as GBS-C can receive RGB from the console and convert the original 240p into 480p, 720p or higher resolutions that a PC CRT can display.
The chain would look like this:
console > RGB > scaler/scandoubler > VGA > CRT PC monitor
The result can be surprisingly good.
Computer CRT monitors were designed to display considerably sharper images than a home television and, in addition, they do not have a fixed native resolution like a modern LCD. With good conversion we can get very well-defined pixels, excellent geometry and the superb motion response characteristic of CRTs.
We can also use scanlines to get somewhat closer to the appearance of a 240p signal, although the result will still be different from a traditional CRT television. A VGA monitor works at higher frequencies and normally has a much finer phosphor structure, so the image can look much cleaner and sharper than what we saw on the living-room television.
Curiously, this once again shows that using a CRT does not automatically mean reproducing “the original CRT look”. We can connect the same 90s hardware to two tube displays and get quite different images.
Dreamcast is an especially interesting exception because it was designed to generate a 480p VGA signal directly in a large portion of its games. With a VGA Box it could be connected to a computer CRT monitor without first converting a 240p signal, and the increase in sharpness over a conventional television was considerable.
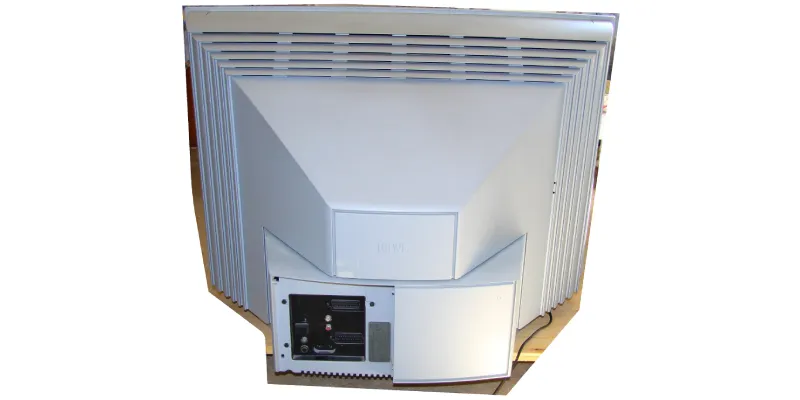
FPGA + CRT or modern display
Here I am speaking entirely from theory because I have never tried one, but from what I have read, an alternative that may be interesting is to use an FPGA system such as MiSTer.
To simplify, an FPGA can reproduce through programmable hardware much of the electronic behavior of the original machines, so it is not the same as running an emulator on a PC, but something closer to the original feel.
The advantage is that you can have many different systems without maintaining a huge collection of consoles, power supplies and cables.
In addition, you can connect MiSTer via RGB to a compatible CRT and reconstruct a large part of the original chain, or use a digital output directly with a modern display.
For someone interested in many retro systems, it seems like a good solution to me, but as I said, I have no experience with it.
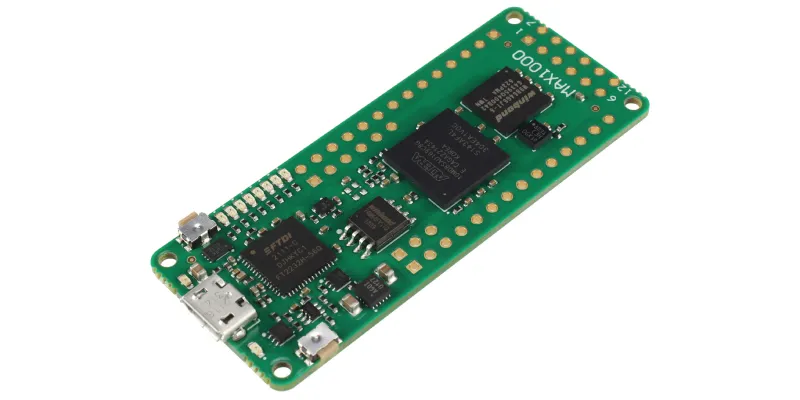
Emulator + modern display + good CRT shaders
Finally, we have the simplest alternative and, at the same time, the one that gives you the most room to experiment.
Emulators such as RetroArch let you apply shaders, a kind of advanced filter that processes the image before displaying it on screen.
With a modern 4K display we have so many pixels available that we can use several of them to simulate some of the visual characteristics of old CRTs.
A good shader can reproduce scanlines, different phosphor masks, bloom, geometry and even some artifacts characteristic of composite video.
Some let you choose between different configurations and approximate, for example, an arcade monitor connected via RGB or a home television using composite video.
This does not turn an OLED into a tube television, because they are very different technologies, but it can produce quite good visual approximations.
And it has one advantage we never had in the 90s: you can change “television” in a matter of seconds. You can view the game with perfectly defined pixels, simulate an RGB arcade monitor and then switch to a home television over composite to see how much each option really changes the image.
So, to understand everything I have explained in this article, it is probably the easiest way to experience it yourself.
By the way, the “mini” versions of NES, Super NES and Mega Drive fall into this category, since they are emulators of the originals.
However, the new 2026 version of Neo Geo (AES+) would be a separate case, since it replicates the original experience but has HDMI output, probably through an internal scaler. When it goes on sale in a few weeks, I will be able to confirm it.
What about cheap HDMI adapters?
I would leave them as a last resort.
Not because converting an analog signal to HDMI is bad -that is exactly what the previous solutions do-, but because most generic adapters are not designed around the peculiarities of old consoles.
For example, they may interpret a 240p signal as 480i and apply deinterlacing that does not help, introduce latency, change the aspect ratio or smooth the image too much.
If all you want is to get something on screen, they work, but we are devoting an entire article to understanding how that image should be displayed, so they do not seem like the best solution.
Conclusion: what did retro video games really look like?
Well, it depends.
And now you do know what it depends on.
First came the machine itself, with its resolution, color palette, sprites and other graphics capabilities.
Then came the geometry used to represent its points, the frequency at which it ran, the connection and signal we used to output the image, and finally the television or monitor that had to display it.
That is why a game run today in an emulator with square pixels and no scanlines is not necessarily “wrong”, just as adding a CRT shader does not automatically make it the most faithful representation. Each of those options is trying to reproduce a different part of the original system.
If you want to see exactly the matrix generated by an SNES, use 256 × 224 with integer scaling.
If you want to approximate its NTSC geometry, you will have to correct the Pixel Aspect Ratio.
If you want to reproduce the look of a good television from the period, you also need to simulate how it represented that signal. Or buy a decent second-hand one and have room for that enormous ass.
And if what you want is to recover your memories exactly, you may even have to plug in and tune the ancient RF setup you used back then.
So the next time an emulator lets you choose between 8:7, 4:3, integer scaling or half a dozen CRT shaders and you wonder which option is correct, you now know why there is no option simply called “original”.
There was never one single original image.
Because the best image a console could generate, the best image the technology of its time allowed and the image you remember are three different things.
And now, with that knowledge, you can decide which one you prefer.

Leave a Reply