
Invoices are usually a problem in any business because they require management and take time.
Because you have to:
- Create them.
- Collect payment.
- Remember to enter supplier invoices into the system.
- Send them to the accounting firm.
- Or save them wherever they belong.
- Reconcile them with bank transactions.
- Extract the VAT from each one for the tax authorities.
- And move the purchase invoices for each quarter for VAT purposes
And I am probably leaving out a few more cases.
Nothing you do not already know if you own or manage a business.
The truth is that, in my personal business, this is not a problem for two reasons:
- I have a fairly agile management system.
- The number of invoices is not high.
But at Yo pongo el hielo things are very different.
On the one hand, there is the generation of between 100 and 200 sales invoices every day, which fortunately the system handles automatically, thanks to the CMS and an in-house development that automatically sends a CSV containing all the data to the accounting firm's management system.
However, purchase invoices, which can number between 5 and 10 a day, are not so easy to automate.
To begin with, half of them are on paper. And you have to:
- Take a photo of the invoice.
- Enter the breakdown into the system (we purchase with 6 different VAT rates).
- Save it in the corresponding folder.
- Reconcile the bank charge the following day.
This process takes one person an average of half an hour a day.
So I thought it would be a good area to optimize with AI, since the human contribution is zero.
When I analyze the process, I can see that step 1 cannot be automated for now: because of our purchasing system, invoices from certain suppliers will inevitably arrive on paper and someone has to scan them.
But steps 2 and 3 can easily be automated.
Step 4 could also be automated, but I prefer to keep everything involving bank credentials manual.
Call me crazy, but there are details, such as bank access credentials, that I prefer to keep in my head and prevent from travelling around.
In this article I am going to explain how I set up the automation. Even though it is only partial, 15 minutes a day adds up to around 3 days a year of mandatory tasks that bring zero value to the business.
Índice de Contenidos del Artículo
- Process for creating an AI assistant to automate invoices
- #3. Configure the scenario in Make
- Conclusion
- Frequently asked questions
- Why are invoices a problem for a business?
- What is the difference between sales and purchase invoices?
- How many invoices can a business manage automatically?
- Why are purchase invoices harder to automate?
- Which steps in the purchase-invoice process cannot be automated?
- Which parts of the purchase-invoice process can be automated?
- How much time is lost managing purchase invoices manually?
- Does it make sense to use AI to automate invoices?
- Can bank reconciliation also be automated?
- Where is the greatest opportunity for improvement in invoice automation?
Process for creating an AI assistant to automate invoices
There are several steps, but despite what the screenshots may suggest, they are quite manageable even if you know nothing about technology, automation or AI.
You will see.
#1. Create a Google Sheets spreadsheet
In this sheet we will list all the fields we need to extract from the invoice:
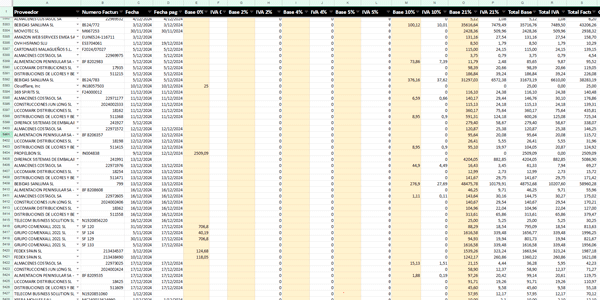
You cannot see them in the image, but in our case we use these fields:
- Supplier
- Invoice Number
- Date
- Payment date
- Taxable base 0%
- VAT 0% (automatic calculation)
- Taxable base 2%
- VAT 2% (automatic calculation)
- Taxable base 4%
- VAT 4% (automatic calculation)
- Taxable base 5%
- VAT 5% (automatic calculation)
- Taxable base 10%
- VAT 10% (automatic calculation)
- Taxable base 21%
- VAT 21% (automatic calculation)
- Total Taxable Base (automatic calculation)
- Total VAT (automatic calculation)
- Invoice Total (automatic calculation)
- Comment
- Month (automatic calculation)
- Quarter (automatic calculation)
- Year (automatic calculation)
Of those, we will only need the assistant to save these:
- Supplier
- Invoice Number
- Date
- Taxable base 0%
- Taxable base 2%
- Taxable base 4%
- Taxable base 5%
- Taxable base 10%
- Taxable base 21%
The rest are automatic calculations, comments or information added by a person.
Two important points:
- The fields must be placed as the header of the table.
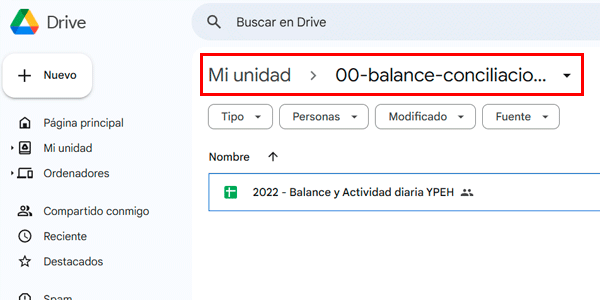
- Once your sheet is ready, save it in a specific Google Drive folder, because we will need to locate it easily later:
#2. Create an account on Make
Make will be the platform where we configure the automation.
Go to Make (https://www.make.com) and create an account if you do not already have one. Signing in with Google is enough:
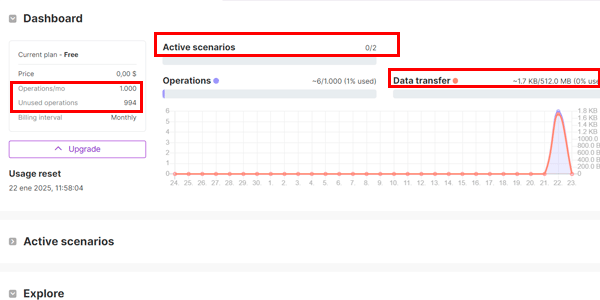
The free plan is enough for what we are going to do:
#3. Configure the scenario in Make
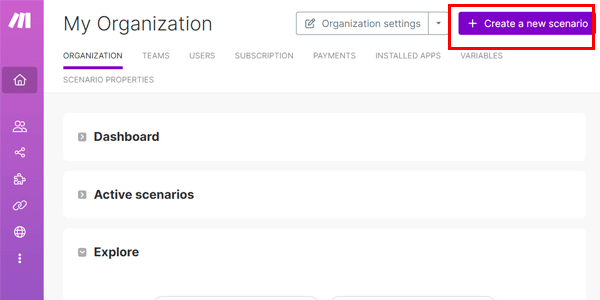
Click “New scenario”:
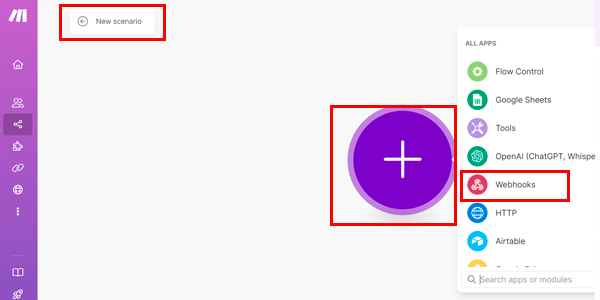
Give the scenario a name, then click the circle and select Webhooks:
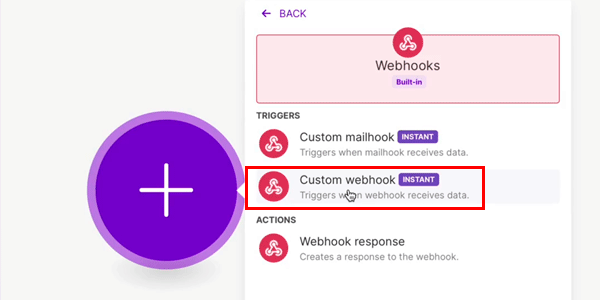
Under Webhooks, select “Custom webhook”:
In the next step, click “Create webhook”, give it a name and save it:

Copy the webhook URL and save:
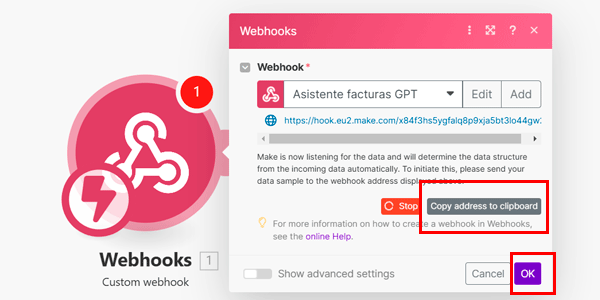
With this, we have achieved what we needed in Make—for now.
#4. Create the assistant in ChatGPT
Now open ChatGPT.
Important: you need a paid account for what we are going to do.
First, create your own GPT. Open the section by clicking the account icon:
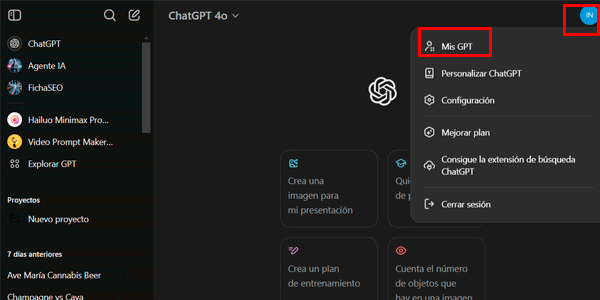
Click “Create a GPT”:
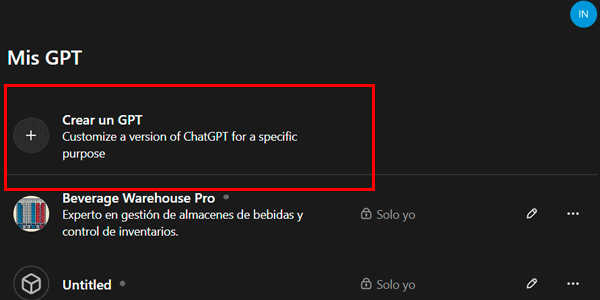
Configure it:
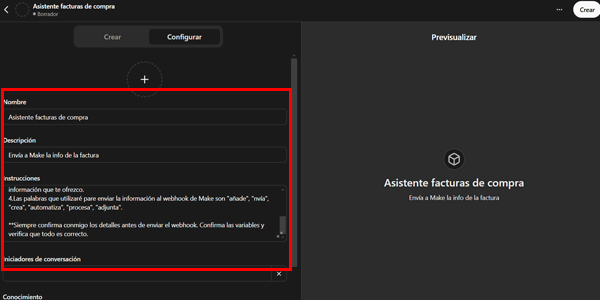
The instructions you need to enter should be something like this:
“You are a personal assistant. You will automate tasks. They will be sent to a Webhook received by Make.com, which will process them.
The instructions are as follows:

1.Make sure you have all the code required for the webhook to work.

2.If anything is missing, do not send the results: ask me for the information you do not have.

3.If you think additional information should be added, always ask me whether it should be added to the webhook. If I say yes, send it. If I say no, do not add it; send only the information I provide.

4.The words I will use to send information to the Make webhook are "add", "send", "create", "automate", "process", "attach".

**Always confirm the details with me before sending the webhook. Confirm the variables and check that everything is correct.”
And leave this selected:
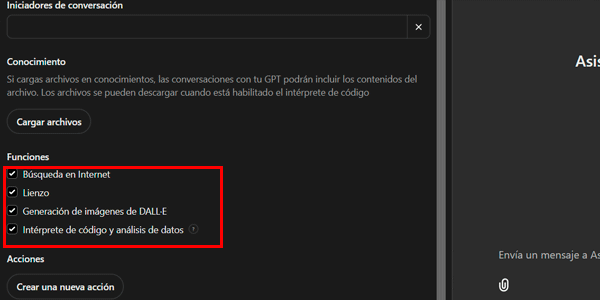
#5. Connect the GPT to the webhook
Now click below:
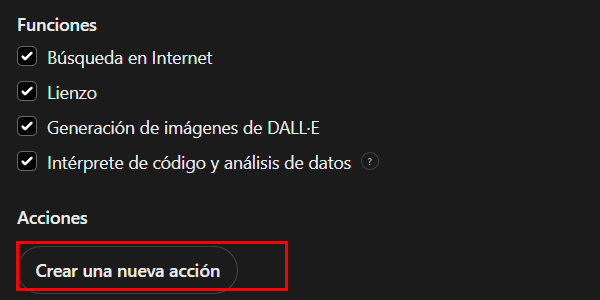
You have two options here:
- Write the data schema yourself.
- Let ChatGPT do it for you.
Obviously, unless you are a developer and enjoy it, I would recommend the second option, which involves opening this GPT: https://chatgpt.com/g/g-zVzDlJ8dR-create-make-com-webhook-schema-s
And paste in the webhook link we created in Make at the end of step 3:
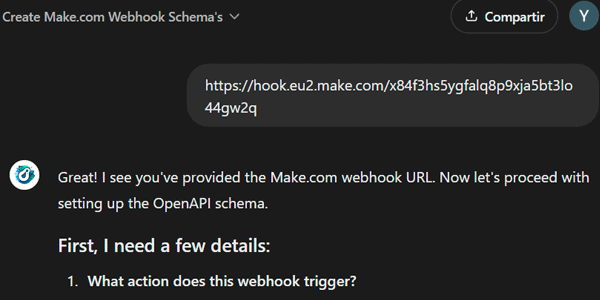
It asks me for the fields we will use in the webhook, which are the required Google Sheets fields from step 1. I provide them:
“I am creating a GPT that sends data to make.com through a webhook so it can be added to Google Sheets. These are the data extracted from the invoice or purchase receipt:
Supplier

Invoice Number

Date

Taxable base 0%

Taxable base 2%

Taxable base 4%

Taxable base 5%

Taxable base 10%

Taxable base 21%”
I verify that the interpretation of the data is correct using the answer it provides.
The GPT also asks me about anything it is unsure of, and I answer:
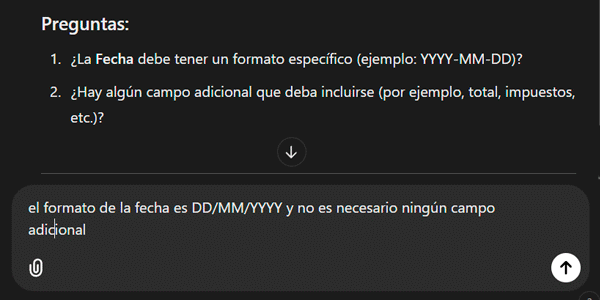
It returns the complete schema and I copy it:
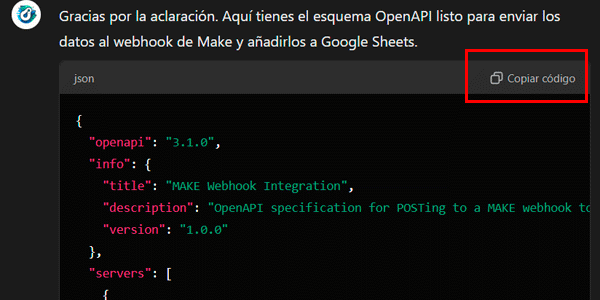
And paste it into my GPT:
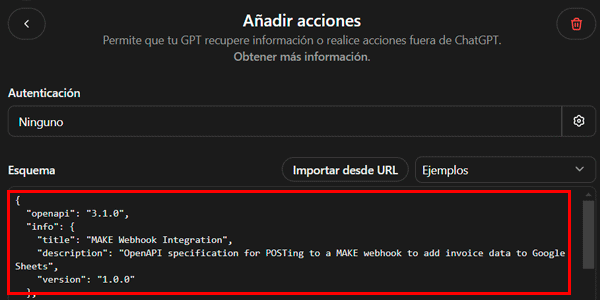
I verify that it uses the “POST” method and, in the privacy policy field, I enter Make's policy (https://www.make.com/en/privacy-notice):
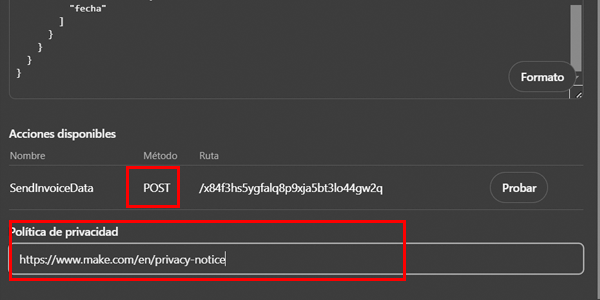
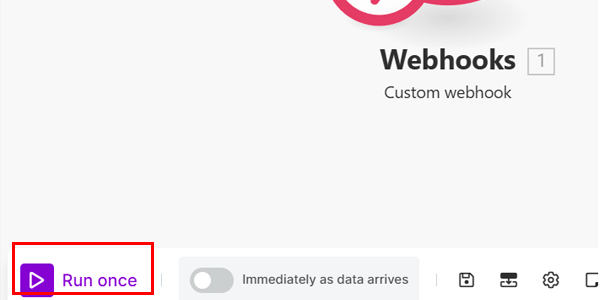
Now we are going to test it with the button you see on the right, but first we need to enable scenario listening in Make from here:
Now I test it from this button:
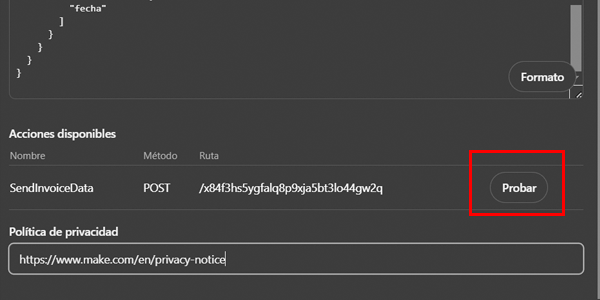
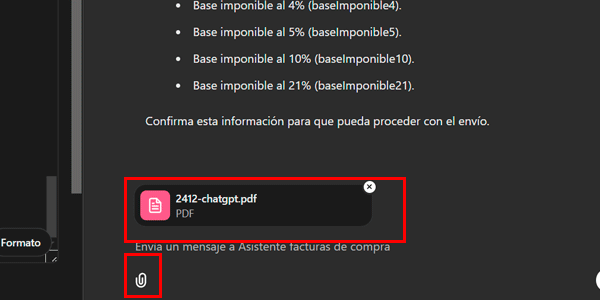
On the right, my GPT asks for certain data, so we are going to upload an invoice using the paperclip icon.
Tip, if you have one containing all the necessary fields—the VAT rates in this case—even better. You will see why later:
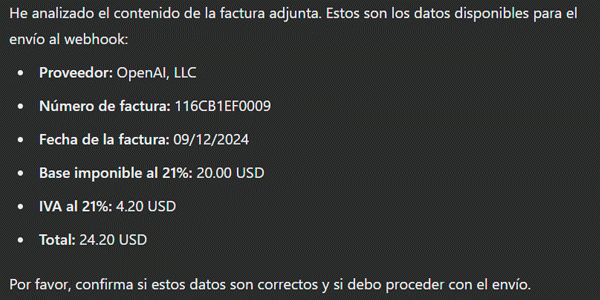
The GPT interprets the invoice and asks us to confirm:
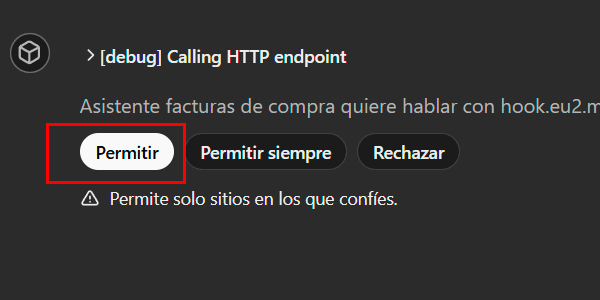
We confirm it and it asks for permission to send the data to the webhook:
We grant permission and go to Make, where we should see something like this:
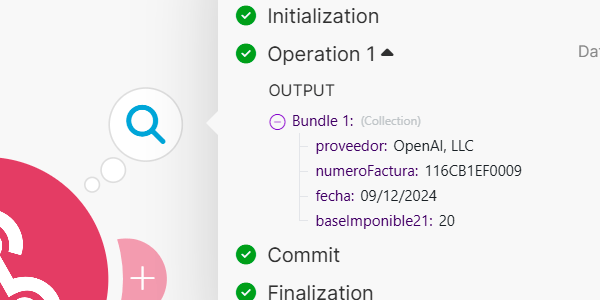
As we can see, the four correct fields have been sent and received.
Although the GPT detected two additional fields (VAT 21% and Invoice Total), it did not send them to the webhook because they were not in the data schema.
In other words, it did exactly what it was supposed to do.
So, in the GPT, I click “Create” at the top and save it with whichever sharing option suits me best:
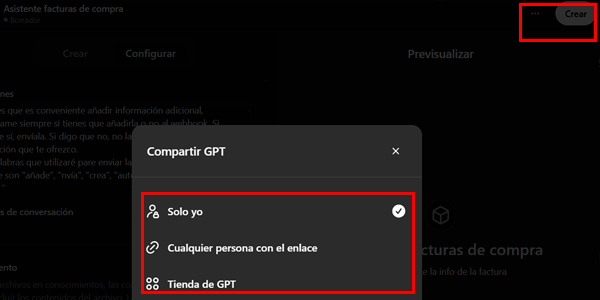
Save.
#6. Insert the fields into Google Sheets automatically
Once we have checked that the fields reach Make correctly from our GPT, all that remains is for Make to add them to our invoice spreadsheet in Google Sheets.
To do this, create a new Google Sheets module in the scenario:
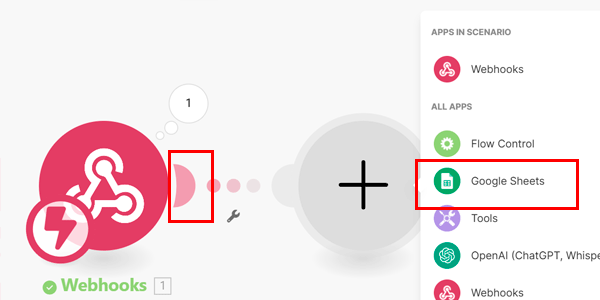
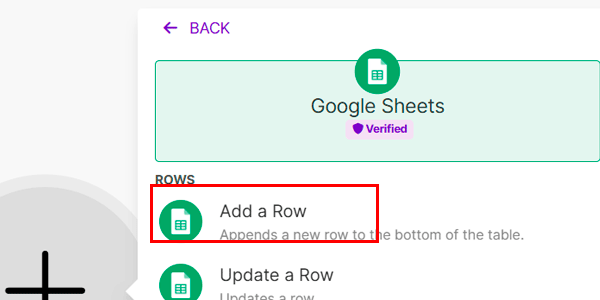
Select the option to add rows, which is what we want the module to do with each invoice:
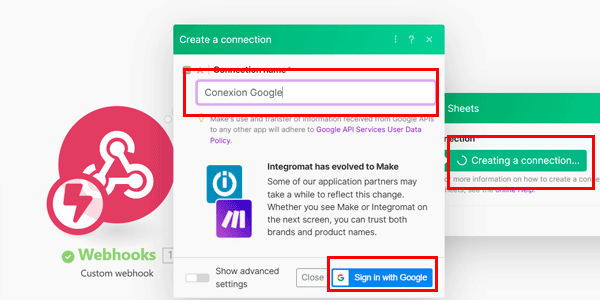
Then we create the connection to the invoice sheet we created in step 1, give it a name and sign in to Google with the account used to create the invoice sheet, using the button for creating the connection.
Find that document in our Drive folder (where we saved it in step 1) using the upper field, and select the sheet inside the document where the row will be added using the lower field:
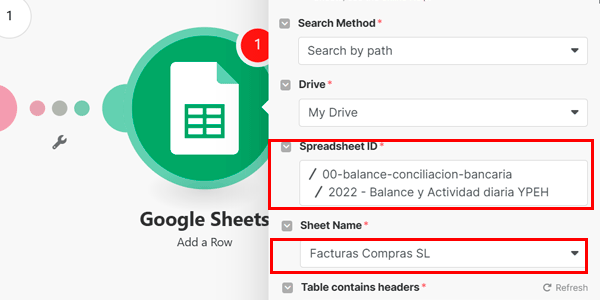
Once it detects the sheet, the connection will allow us to map the webhook fields to the column where they will be entered.
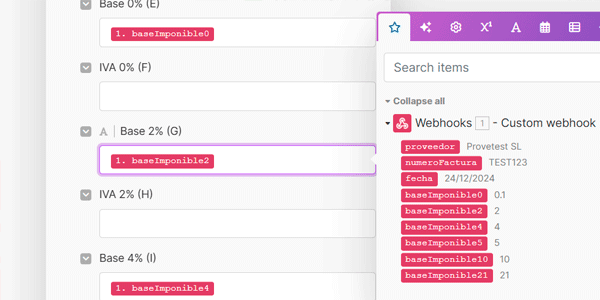
To do this, simply select a field in the box so that a window opens with the webhook fields. Click the corresponding one:
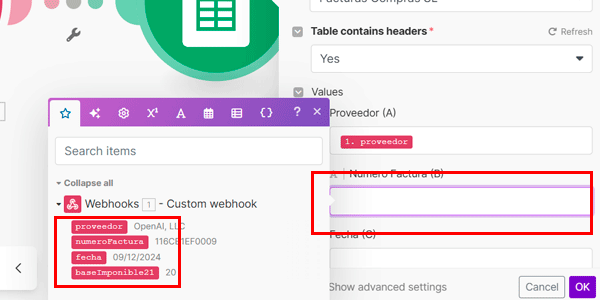
Once I have mapped all the fields, I click the “OK” button to save them.
Important 1: the receipt or invoice we uploaded may not include all five VAT rates we handle. In that case, we will not be able to map all the web service fields to the required columns in Google Sheets.
What I did in this case was create a dummy invoice in Excel with every possible VAT rate and save it as a PNG (to test how it interprets text and numbers in images):
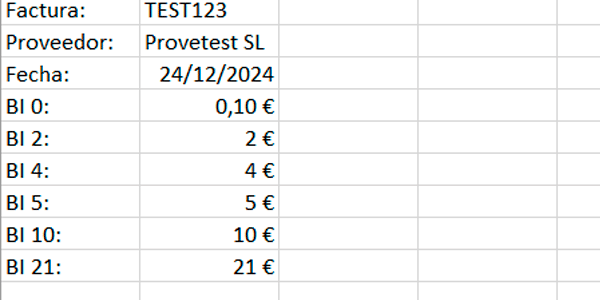
I send it to the assistant again using the “Test” button from step 5, with the Make scenario set to “Run once”.
We can see that the assistant interprets it correctly:
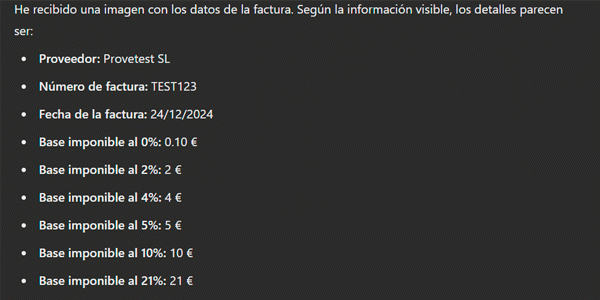
The Make scenario receives the data correctly:
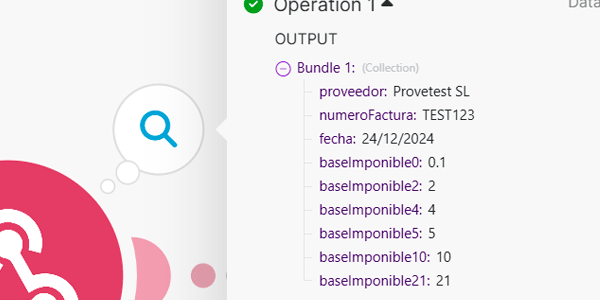
So we map the missing fields in the Google Sheets module of the Make scenario:
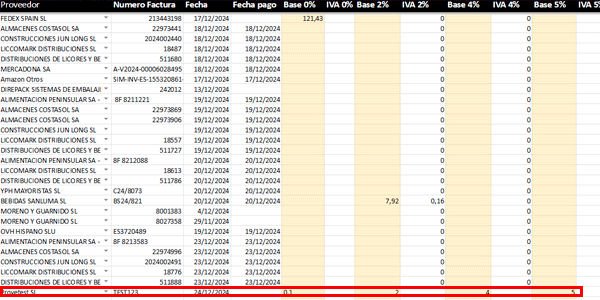
And we can see that they are all correctly added to the Google Sheets document:
Important 2: depending on the decimal settings in your Google Sheets file, you may need to change the decimal separator to a comma “,” instead of a period “.” so that the spreadsheet interprets it as a number.
To do this, select this type of value:
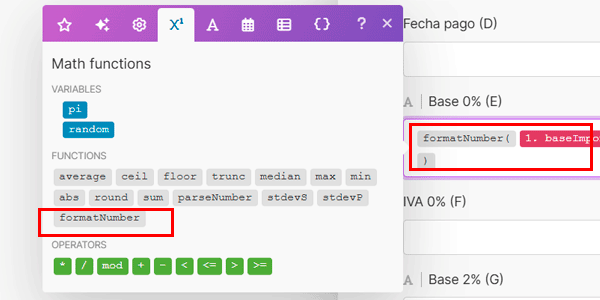
And place the field in the middle together with these values, like this:
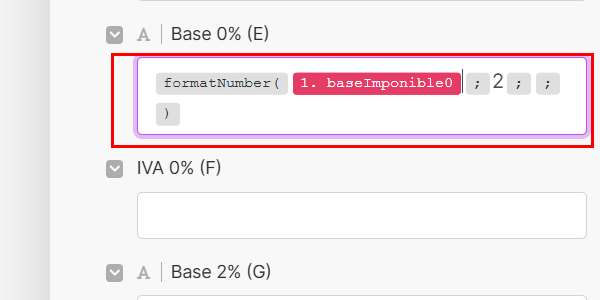
Once you add this formula to all taxable-base fields (if necessary), everything will be configured correctly.
As you can see in the image above with the inserted fields, some columns remain empty, which we already knew because they contain automatic calculations.
To fill them, I only have to drag the formula manually AFTER insertion when needed. I could also modify the Google Sheets module, but I prefer not to complicate things further—for now.
#7. Final activation
As the final step, we only need to save the Make scenario:
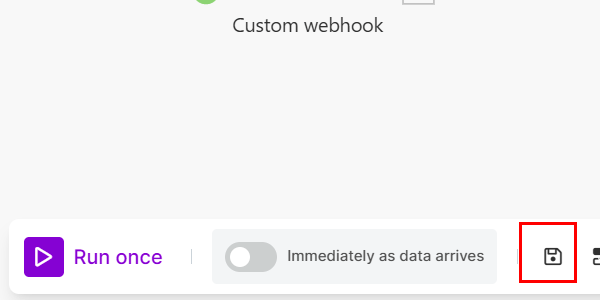
And leave it permanently enabled from here:
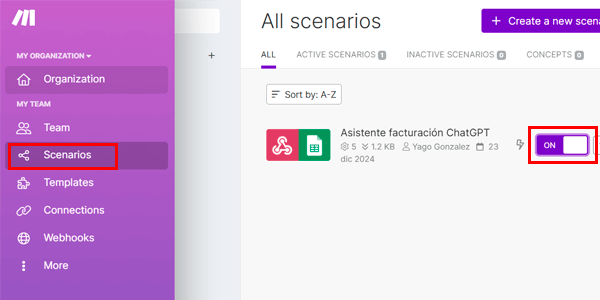
From this point on, whenever we open our GPT's URL and give it an invoice, it will magically and automatically be added to our invoice Google Sheets file.
Pretty good, right?
Conclusion
We are done.
I imagine it took you about an hour to follow all the steps if this is your first time working with automation or Make.
I consider that time well spent, because these tasks only consume time without contributing anything to your business. Better to let a machine handle them.
I also think this automation is a good entry point into this world because, while it is not basic, it is not complex either. And, as I said before, it delivers value.
I hope it helps you see the usefulness of AI beyond generating text, images or videos.
Here are more articles about Artificial Intelligence applied to business. If you like them, I will send you one every week if you subscribe here.
Frequently asked questions
Why are invoices a problem for a business?
Because they involve many manual tasks: creating them, collecting payment, recording them, sending them to the accounting firm, reconciling them with the bank and managing VAT. All of this consumes time and complicates daily operations.
What is the difference between sales and purchase invoices?
Sales invoices can be automated easily because they come directly from the system. Purchase invoices, however, often arrive on paper and require manual intervention.
How many invoices can a business manage automatically?
In the case described in the article, between 100 and 200 sales invoices a day are managed automatically thanks to a system connected to the accounting firm.
Why are purchase invoices harder to automate?
Because many arrive on paper and require manual tasks such as photographing them, entering the data, saving them and reconciling them with the bank.
Which steps in the purchase-invoice process cannot be automated?
Scanning or photographing the invoice when it arrives on paper. That step inevitably requires human intervention.
Which parts of the purchase-invoice process can be automated?
Entering data into the system and storing the invoices, since these are repetitive tasks with no added value.
How much time is lost managing purchase invoices manually?
Around half an hour per person each day in the case described, making it a clear area for optimization.
Does it make sense to use AI to automate invoices?
Yes, especially for tasks where the human contribution is minimal, such as extracting and structuring invoice data.
Can bank reconciliation also be automated?
It could be, but the article chooses to keep that step manual because it involves sensitive information such as bank access credentials.
Where is the greatest opportunity for improvement in invoice automation?
In purchase invoices, because they concentrate the manual work and time consumption, unlike sales invoices, which are already automated.

Leave a Reply