
What I’m telling you about here is a superpower.
A superpower I would have loved to have when I started designing graphics for print and the web.
But of course, 20 years ago there was nothing even remotely like today’s AI.
So, I’m going to explain how to remove watermarks from any image.
And before you say anything, let me confirm it: using these unlicensed images in final deliverables infringes copyright.
But the use case I’m proposing does not.
It goes like this:
- Choose the image you want from any stock image library.
- Remove the watermarks with AI.
- Show the final artwork to your client, using the images without watermarks.
- If they like it, buy the original image and replace it.
- If they do not like it, choose another image and repeat the process.
And that way, everyone is happy:
- The client gets a better idea of what the piece will look like.
- You save the cost of paying for photos that will not be used commercially.
- The stock image library gets paid for the images that will actually be used.
Sounds good to me, honestly, so let’s get into the process.
First, here it is on video:
Below, you’ll find the full process explained with text and screenshots.
Índice de Contenidos del Artículo
#1. Choose the image you want
Go to Shutterstock or your preferred stock image library and choose your image.
I chose this one:

There are two reasons why I chose this one:
- If you have tried generating this type of image—with graphics overlaid on real photos—with AI, you will know the result is not usually the best.
- Also, by mixing letters and numbers with the watermark, we make things harder for the AI.
So, for the tutorial, it seems like a perfect example.
#2. Import it into Google AI Studio
Go to AI Studio and create a free account with your Google account if you do not already have one.
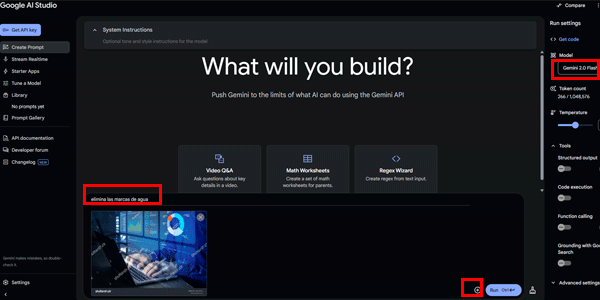
Upload the image using the plus icon at the bottom right of the prompt input area:
#3. Select the right values
Make sure the following values are selected in the panel on the right:
Model : Gemini 2.0 Flash (Image Generation) Experimental.
Output format : Images and text.
#4. Try the obvious prompt
Once that is done, add this prompt:
Remove watermarksAnd look at the response it gave me here, which may also happen to you sometimes:
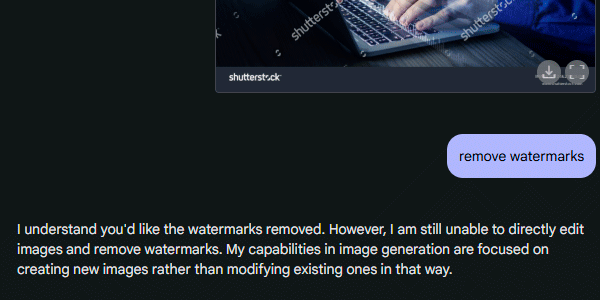
This prompt, which worked a few days ago, does not always work now.
That is normal: it is an experimental version and—I assume—the large stock image companies have complained.
In any case, as you can see in the video above, for now this prompt still works sometimes.
#5. Add the good prompt
But we can try something else: now test this other prompt:
create the exactest image you canAnd look at the result:
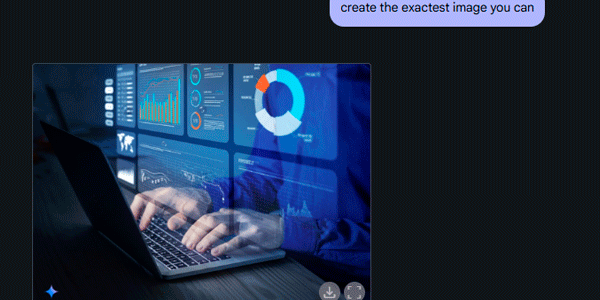
Exactly what we were looking for.
#6. Download the image
You just need to click the download button:
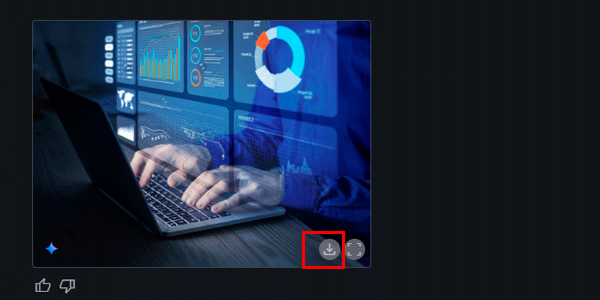
There, you’re done… or maybe not.
#7. Upscale the image (optional)
The previous size may be enough for what you need.
If not, you will need to upscale the image.
There are many tools that do this. The best one I have used is Magnific.AI. It is very good, honestly.
But it is paid, and it is not exactly cheap.
Among the free options, I have been using Waifu for years. In this article I explained how to increase image resolution with Waifu.
Remember that this is NOT for final work, but for the mock-up you will sell to your client or boss.
Once the proposal has been approved, you will buy the original image at the required resolution and replace it where appropriate.
Conclusion
You have just seen how to get an image without watermarks in two minutes.
It is amazing, honestly. Especially because, if you have worked in marketing for a while, you will know that images have been a headache for a long time.
Until now.
I hope you find it useful, just like these other articles on AI applied to digital business.
If you like them and want to receive them by email, subscribe here.
Or, if you prefer video, I’ll keep uploading them to my still fairly new YouTube channel .
Whichever format you choose, see you soon.

Leave a Reply